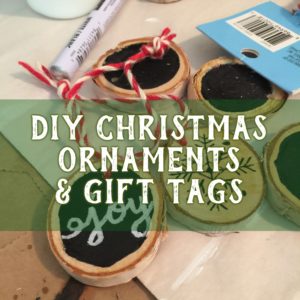
I know, it has been a very long time since you have heard from me. Life has been crazy busy with school starting, driving my step-son to his bus every day, getting my husband ready to go hunting, fall activities and working on fall and Christmas projects. I had a very successful Ladies Only Fall Craft Day, where we made wood pumpkins and cinnamon stick ornaments and since then I have been working on my birch wood ornaments and gift tags! These two projects are very simple to recreate in your own home or you can purchase from me on Etsy by visiting this link, www.bethannerickson.etsy.com!
The Christmas ornaments and gift tags in the following tutorial are perfect for the rustic Christmas tree or rustic themed gift wrapping and will add an unique touch to your wrapping or decorating. They are also very affordable simple and to make.

Step One: Layout your wood rounds on a covered work surface. I use paper grocery sacks.

Step Two: Decide if you want to paint all of your wood rounds black or leave some of them natural. Paint a black circle that does not reach all the way to the edge on the ones you want to be black. Let dry completely.
Step Three: While you are letting these dry, you can draw or write on the unpainted wood rounds with your black sharpie. As you can see from the pictures, I drew an owl, snowflakes or holiday greetings. The possibilities are endless.

Step Four: When your black paint is dry, use your chalk pen or white gel pen to draw your snowflakes, holiday greetings or other art on top of the chalk paint. Let dry completely.
Step Five: If your wood rounds or wooden gift tags did not come with pre-drilled holes you need to choose which side is the top of your ornament and drill your hole there.

Step Six: Add your chosen twine, ribbon or string through the hole as the hanger and your project is complete!
See, wasn’t that so very easy! Just 6 very simple steps and your project’s ready to go. If you don’t feel comfortable drawing on your ornaments or gift tags you can always buy stickers or rub on transfers that will show up on the black paint or bare wood. You might need to go over the stickers with a coat of Mod Podge to make sure they stay affixed and last from year to year.
Please feel free to comment, ask questions or send me pictures of your completed projects! I would love to see them!
Again, if you don’t have the time to make your own, you can visit my Etsy store to purchase.
Thanks for reading and enjoy the fall weather! This time of year is the perfect time of year for craft projects!