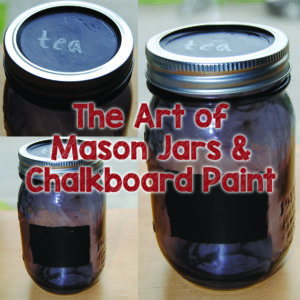
I recently started drinking loose leaf tea, which means I need some where to store my different varieties. So I started brainstorming and hit on this idea, mason jars! I have plenty of them just sitting around my house. The perfect solution to my dilemma, I will store my tea in mason jars. But wait, I need to know what tea is in my jars. How will I label them? And it came to me, chalkboard paint and chalk, then I can easily change the name on the jar when I buy a different flavor of tea. There is also bulk spices, bulk foods, coffee beans, buttons, string, craft supplies and more that I need to store and label. Being a crafter I keep all sorts of things thinking, “oh these will be useful in the future,” but where to store them? What better to use than a mason jar!
Mason jars and chalkboard paint, are both very trendy right now. You can find them in any craft store, grocery store or one-stop shopping center and most people have mason jars or some sort of empty jar sitting around their house that can be put to good use. So don't think you have to go out an buy a mason jar to put this tutorial to use. You can use any jar with a metal or plastic lid for this project. Here are the supplies you need and 4 very simple steps to complete this project.

Step One: You need to decide where you would like to label your mason jar. Do you want the label on the front, on the lid or both.
Step two: Clean the insert and the mason jar in warm soapy water.
Step three: Painting


Step four: Fill your mason jar with the items you would like to store and label with chalk. Make sure you paint is completely dry before you label it. Also, its best to use your chalk on some paper first to get a smooth tip on it. If you press to hard you will scrap off your chalkboard paint. So be very careful.

As you can see from this photo the chalk wipes right off with a damp tissue, so that you can re-label your jar.
See, that was a very simple project. It was creative and helped you organize your home at the same time! You can apply the steps in this project to any glass or plastic container you use around the house that you want to be able to change the label on.
Next Week: I am on vacation in the Redwoods to celebrate my one year anniversary with my wonderful husband Michael. I am sure I will have many new creative ideas when we get back from our trip to share with you and I will be sure to share some photos and stories from our adventures. Also check out my tutorials on www.instructables.com along with many other great tutorials.