Christmas Ideas: My Favorite Photo Products

It is that time of year! Time to figure out what to do with all your photos from this year. The ones from vacation, the ones from sporting events and day trips, the ones from holidays last year and so much more!

See the galleries below for some of my favorite ideas from www.zazzle.com. I hope this helps get your creativity flowing!

Christmas Cards

Gold Glitter Photo Christmas CardFlat Holiday Card

Gold Glitter Photo Christmas CardFlat Holiday Card

by EricksonDesigns

Merry & Bright Flat Card Christmas Card

Merry & Bright Flat Card Christmas Card

by EricksonDesigns

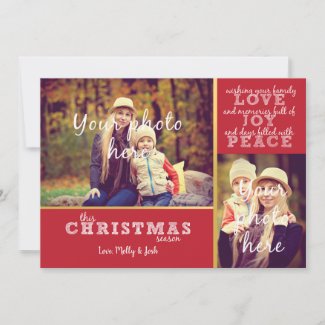
Love, Joy & Peace Flat Card Christmas Card

Love, Joy & Peace Flat Card Christmas Card

by EricksonDesigns

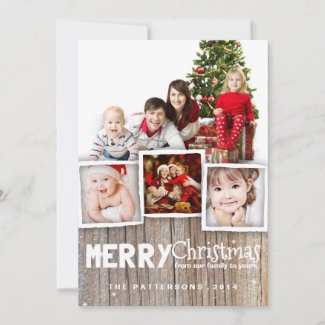
Country Rustic Wood Merry Christmas Photo Card

Country Rustic Wood Merry Christmas Photo Card

by kat_parrella

Photo Calendars

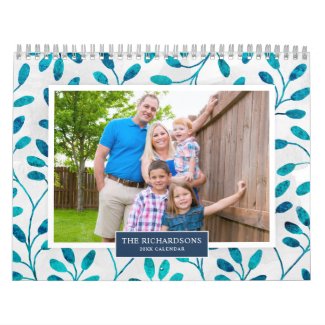
Family Photo 2019 Calendar Seasonal Backgrounds

Family Photo 2019 Calendar Seasonal Backgrounds

by superdazzle

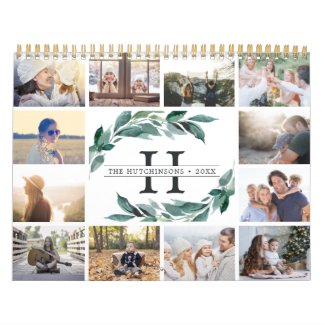
Winter Abundance | 2019 Photo Calendar

Winter Abundance | 2019 Photo Calendar

by RedwoodAndVine

Gift Ideas

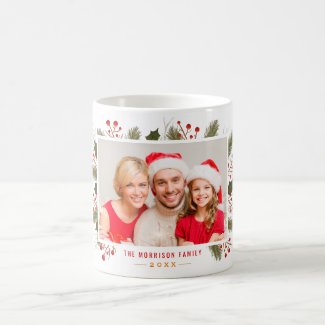
Create Your Own Holiday Christmas Family Photo Coffee Mug

Create Your Own Holiday Christmas Family Photo Coffee Mug

by UrHomeNeeds

Trendy White Overlay | Your Family Photo Canvas Print

Trendy White Overlay | Your Family Photo Canvas Print

by christine592

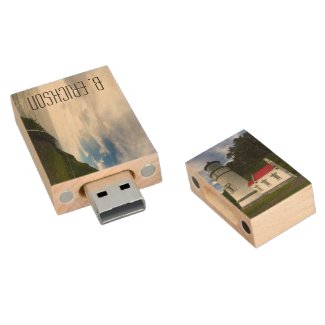
Oregon Coast Lighthouse USB Wooden Flash Drive

Oregon Coast Lighthouse USB Wooden Flash Drive

by MadDogPhotography

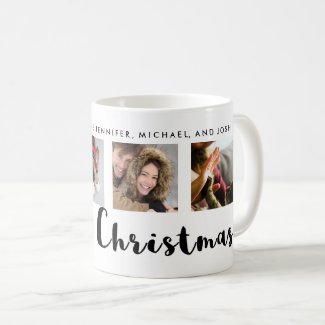
Modern Typography Christmas Four Photo Grid Coffee Mug

Modern Typography Christmas Four Photo Grid Coffee Mug

by christine592

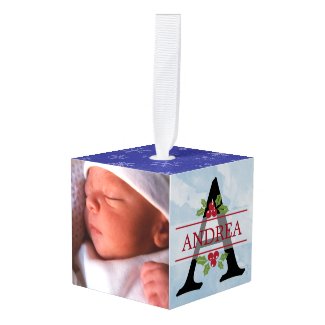
Baby's First Christmas Block Ornament

Baby's First Christmas Block Ornament

by EricksonDesigns

Custom Photo Pewter Framed Ornament

Custom Photo Pewter Framed Ornament

by MadDogPhotography

I hope this gallery of images inspires you and gives you creative ideas of how to use all those photos you take each year! A personalized photo gift will convey the thought and love that went into the gift you are giving that special someone.

Top Three DIY Easter Crafts

We are just few weeks away from Easter and I thought this would be the perfect time to review my Easter tutorials and DIY projects.

Today I will provide links to my top three tutorials from previous years and talk about two alternative ways to decorate Easter eggs (with links included).

My sister and I are going to dye Easter eggs again this year and I thought it would be fun to try two new ways to decorate our eggs (highlighted below). After trying these I will be writing a blog evaluating each process. My goal is to help direct you to the process that will work best for you and your family.

In March of 2017, I wrote three blogs on Easter gift ideas and DIY decorations.

Mason Jar Easter Gifts

The Mason jar Easter gifts gave you new and creative ways to package your Easter gifts. Also included was a free download (which is still available).  This tutorial can be found here along with the free download.

DIY: Rustic Easter Carrots

That same month I wrote another tutorial on making rustic twine carrots which can be used in Easter/Spring decorating around your home. I enjoy decorating for a variety of holidays and hope some new ideas will encourage you.  Find the Rustic Carrot tutorial here.

DIY: Easter Garland

Then we also enjoyed a tutorial on how to make your own watercolor “Easter Egg” garland, which is a perfect project to do with your children or in a classroom. In this tutorial we painted traced “egg” shapes with watercolors, cut them out and punched holes in them. Then we attached ribbon to make a garland. This idea would also work well for Easter gift tags or greeting cards. You can find this tutorial here.

Alternative Egg Decorating Ideas

There are two alternative egg decorating ideas that I am going to explore this year. One involves bleeding tissue paper and the other shaving cream! Both of these directions give you multi-colored Easter eggs and they look like they might be easier for young children and less messy than traditional methods (no cups of dye to knock over or splash on your neighbor, counter or kitchen table).

The first tutorial uses shaving cream and food coloring. All the steps are outlined here on www.athriftymom.com.

Next up is dying Easter eggs with tissue paper. The key to this one is buying “bleeding” tissue paper - the only type of tissue paper that will leave colors behind on your eggs. You can find the complete step by step process here on www.thecraftyblogstalker.com.

I will post my evaluations and pictures of the new processes soon, so look for that coming up. Until then enjoy the Easter season and find joy in the fact that spring is upon us!

For The Love Of Mason Jars

6 Mason Jar Tutorials Revisited

Maybe it’s just me, but I am obsessed with Mason jars. I am always looking for a new way to use them and I am still coming up with a few new ideas here and there! With the beginning of the New Year, I thought this would be a good time to revisit six of our previous Mason jar tutorials, along with a few new ideas and a glimpse into coming tutorials.

We have touched on how to use mason jars for gifts, storage and how to use the lids and rings to create unique memories for your Christmas tree.

But first a little Valentines Day treats! New to the Etsy shop are two instant downloads that can be used on a Mason jar or a milk bottle to make a sweet treat for your special someone! These downloads are designed to match two candies, Reese’s Pieces and Red-hots! Click the images above to purchase the download and complete your own Valentine’s Day project. Then read on to review our previous Mason jar tutorials and find on that fits your needs.

Tutorials revisited:

  1. The Art of Mason Jar Gifts • Using Mason Jars as gift baskets.
    (www.bethericksondesigns.com/allthingscreative/2016/4/25/the-art-of-mason-jar-gift)
  2. The Art of Mason Jars and Chalkboard Paint • Using mason jars as canisters.
    (www.bethericksondesigns.com/allthingscreative/2016/5/30/the-art-of-mason-jars
  3. Pumpkin Granola and The Art of Hostess Gifts • Pumpkin granola packaged in a mason jar for a hostess gift, free recipe and download included. (www.bethericksondesigns.com/allthingcreative/2016/11/10/pumpkin-granola-and-the-art-of-hostess-gifts)
  4. Mason Jar Easter gifts • Using Mason jars as Easter baskets with a free download.
    (www.bethericksondesigns.com/allthingcreative/2017/3/29/mason-jar-easter-gifts-free-download)
  5. Father’s Day Gifts Simplified • Dad has everything he needs right? Why not tell him how you feel about him with a themed candy jar.
    (www.bethericksondesigns.com/allthingscreative/2017/6/9/fathers-day-gifts-simplified)
  6. Homemade Christmas Ornaments • Photo Christmas ornaments made from Mason jar rings and lids.
    (www.bethericksondesigns.com/allthingscreative/2017/12/14/diy-homemade-photo-christmas-ornaments)

I am sure these are not the last Mason jar ideas I will come up with, but I thought it might be helpful to have them all listed in one place for easy reference! I am sure if you searched online you could probably find a ton more! Why? Because Mason jars are really just so much fun to find new use for! From vases to water glasses and so much more!

Just to prove my point, coming soon to the blog I will have a tutorial on making table numbers for your wedding or party using the Mason jar rings, lids and wine or sparkling cider bottles.

Visit www.bethericksondesigns.com for other great tutorials and daily encouragements!

The ART of GIVING

Sunday • November 26

Small Pocket Wallet

Do you know someone who never carries a purse, complains their wallet is too heavy or who likes to throw some money and credit cards in their pocket and head out the door. If so, one of these fabric credit card holders would be perfect for them, lightweight and small enough to fit in a pocket. They come with the option of two or four pockets and they are perfect for a stocking stuffer or to mail. Shop here: Two Pocket & Four Pocket.

Tomorrow is our last day of the series and we are featuring a local family run small business so make sure you come back to find out who it is!

The ART of GIVING

Wednesday • November 22

Christmas Ornaments

I love to give my stepsons a Christmas ornament each year, chosen just for them. It’s a fun way to make memories and it also means they will each of a small collection of ornaments to take with them when they move into their own place.

You can find Christmas ornaments as unique as the person your giving it to.  From themed to personalized, Etsy has it all.

The ornaments pictured here come from these two shops on Etsy: Kute Kustom Kreations and Roz Petalz Studio.

See you on Thanksgiving for day three in The ART of GIVING!

The Art of GIVING

Life has seemed to take off and I have just simply not had time to write any blog posts and now we are deep into the holidays with Thanksgiving upon us and Christmas shopping. I just finished with my final craft fair of the year and now I seem to have a little bit of time on my hands and started thinking about Christmas the art of giving and how it makes someone feel when you come up with perfect gift to give them. I have compiled some ideas and will be sharing them over the next seven days. Since we have Black Friday and Cyber Monday coming up, now is the perfect time to share them with you. Maybe I will come up with some more ideas after the first seven days. We shall see. Here is today's to kick start the series!

Tuesday • November 21

Mason Jar Tumbler

These Mason jar tumblers make the perfect vessel for a gift full of surprises. They boast a handmade reversible mason jar cozy and a silicone lid to drink from. Coffee, tea and water all taste better if served in glass! Fill it with candy, gift cards, nail polish, and packages of peanuts, tea, coffee and more, to give a gift as unique as the person you are giving it too. (CLICK HERE TO SHOP)

Look for our next gift idea tomorrow and for the next seven days. Do you have an Idea I should feature or want to share? Go ahead a post a comment! Until tomorrow!

Father’s Day Gifts Simplified

Wow, I don’t know how many months it has been since I have sat down to write, but I think it has been at least three or four. I am not sure where time went, except that we moved to a new home that is a little farther from everything and so the routines of daily life just eat up a little more time than they used to. Its also gardening, lawn mowing and sitting on the patio season, which of course all take up time that was used for other things during the winter months. I have to say though I am so happy to see the sun more often these days! 

All this talk about time leads me to my topic for today, simple Father’s day gifts. You don’t have to spend a lot of money or time to make the dad’s in your life feel special and appreciated. So I have come up with a few gift ideas that are easy to accomplish. Two of them you can make yourself, the other’s you can purchase from this great website Zazzle, that allows you to personalize almost anything you can imagine.

We will start with Zazzle and then move on to the super simple DIY Father’s day appreciation gift that is sure to bring a smile to any dad’s face.

Zazzle is a website that allows you to personalize a very large variety of things. They have mugs, aprons, poker chips, USB drive, golf balls, baseballs and much more! 

Here are a few of my favorites for Dad! (Clink the photo for more information or to order)

For the cook:

For the hat lover:

For the Musician:

For the coffee lover:

For the technology lover:

There are a lot more ideas on Zazzle, but I don’t have the room to list them all. You should go check them out for yourself and find the perfect gift for your dad or make one of our super simple DIY gifts below.

Our DIY gift only requires you to purchase candy and a jar of some sort unless you have one sitting around the house and an instant download from Etsy, to print at home and decorate your jar.

Jar #1: We love you to pieces or I love you to pieces (Purchase)

Supplies needed:

Jar #2: You're a peach!  (***Please note the typo on the tag for "You're a peach" has been fixed in the downloads 6/16/17)

Supplies needed:

NEW!!! Jar #3: You're a Barrel of fun (Purchase)

Supplies needed:

The steps to complete this project don’t take much time at all.

Step One: Print your instant download and trim to size

Step Two: Fill your jar with the appropriate candy and close with lid

Step Three: Tape or glue your jar wrap around your jar

(***Please note the typo on the tag for "You're a peach" has been fixed in the downloads 6/16/17)

Step Four: Punch a hole in your gift tag and attach it to the top of your jar with string or twine

And you’re done! Your Father’s Day gift is ready to go, with little money, time and stress spent on the project! Also check out our other Father’s Day labels on Etsy. (Click the pictures below for more details.)


Enjoy the holiday and celebrate your dad!

Mason Jar Easter Gifts (Free Download)

The first day of spring has come, daffodils are blooming andtulips are beginning; all of this means Easter is drawing near! So…. Easter egg hunts, baskets, gifts and celebrations are just around the corner!

I love going to the craft store and buying new craft supplies, but I also find joy in using supplies I have around the house to make something special for that special someone. This blog is dedicated mostly to things I already have on hand and stars another one of my favorite things, mason jars! I am not sure where my love of mason jars came from, but they really are very useful around the house. I use them in the kitchen, for decorations, in my craft room and for gift ideas all the time!

This project falls right in line with a blog I wrote last year about mason jar gift baskets and all the different things you could fit in mason jars to make a unique gift, tailored to the person you were giving it too.

Easter can get really expensive with Easter eggs to fill, Easter baskets to give, eggs to dye, candy to buy, special desserts to make and so much more. So lets cut some of the cost by using some things we already have on hand.

Supplies needed:

This project really is very simple if you follow these steps.

Step one: Trim your parchment or tissue into a square. You can use any size square that will hang down over the sides of your jar. The size depends on how much you want your paper to hang over the edges.

Step two: Fill your Mason jar with your gifts.

Step three: Separate the Mason jar ring and the Mason jar lid.

Step four: Place your paper square on top of the ring and, press the lid into place allowing the paper to gather at the edges. Screw lid on the Mason jar. Optional version: Print out the mason jar label, trim to fit your mason jar lid, place square sheet of paper on ring, line up your label and lid and place on top of paper. Then, continue as above.

Step Five: Tie ribbon around the Mason jar ring.  Attach a gift tag if needed.

Enjoy your Easter season!

DIY Chalk Ornaments & Gift Tags

Follow my blog with Bloglovin

I know, it has been a very long time since you have heard from me. Life has been crazy busy with school starting, driving my step-son to his bus every day, getting my husband ready to go hunting, fall activities and working on fall and Christmas projects. I had a very successful Ladies Only Fall Craft Day, where we made wood pumpkins and cinnamon stick ornaments and since then I have been working on my birch wood ornaments and gift tags! These two projects are very simple to recreate in your own home or you can purchase from me on Etsy by visiting this link, www.bethannerickson.etsy.com!

The Christmas ornaments and gift tags in the following tutorial are perfect for the rustic Christmas tree or rustic themed gift wrapping and will add an unique touch to your wrapping or decorating. They are also very affordable simple and to make.

Supplies:

Step One: Layout your wood rounds on a covered work surface. I use paper grocery sacks.

Step Two: Decide if you want to paint all of your wood rounds black or leave some of them natural. Paint a black circle that does not reach all the way to the edge on the ones you want to be black. Let dry completely.

Step Three: While you are letting these dry, you can draw or write on the unpainted wood rounds with your black sharpie. As you can see from the pictures, I drew an owl, snowflakes or holiday greetings. The possibilities are endless.

Step Four: When your black paint is dry, use your chalk pen or white gel pen to draw your snowflakes, holiday greetings or other art on top of the chalk paint. Let dry completely.

Step Five: If your wood rounds or wooden gift tags did not come with pre-drilled holes you need to choose which side is the top of your ornament and drill your hole there.

Step Six: Add your chosen twine, ribbon or string through the hole as the hanger and your project is complete!

See, wasn’t that so very easy! Just 6 very simple steps and your project’s ready to go. If you don’t feel comfortable drawing on your ornaments or gift tags you can always buy stickers or rub on transfers that will show up on the black paint or bare wood. You might need to go over the stickers with a coat of Mod Podge to make sure they stay affixed and last from year to year.

Please feel free to comment, ask questions or send me pictures of your completed projects! I would love to see them!

Again, if you don’t have the time to make your own, you can visit my Etsy store to purchase.

Thanks for reading and enjoy the fall weather! This time of year is the perfect time of year for craft projects!

Olive Oil

The art of infused oils

Personally, I love cooking with flavored olive oil. It makes me feel like a gourmet chef! The only problem is I have found purchasing flavored oils can be quite expensive. The flavors are excellent and the meal tastes good when I get done, but do I really have to spend a lot of money to get that result?

As I write this I am getting ready to embark on trial run of creating my own flavored olive oil. Why? A few reasons. I love finding ways to cut costs. I like trying to new creative recipes. I have fresh herbs growing in my back yard and I am looking for a creative way to use them. I also think that flavored oils will make great gift ideas if I can create them myself at home. Packaged in a beautiful bottle or jar, with a cute gift tag and you have a wonderful gift that anyone who cooks can use.

To start, I have been doing some research online on how best to prepare the herbs so that they will infuse the oil with the most flavor, how long to let them infuse and how to keep the oil from growing bacteria. (Side Note: I didn't even know this could be an issue until I started my research. I really glad I did some reading before starting this project, I would not want to be responsible for getting anyone sick.)

First, is to decide what flavors you think will go well together. I have chosen about onion, rosemary and oregano. I chose these flavors because I have them growing in my backyard. You could also make fruit infused olive oils to use in combination with vinegar for home made salad dressings. I am also thinking you could create your own flavored vinegar. For this trial run, I am going to stick with herb based oil infusions. (But would love to hear about your fruit experiments if you try any).

Next, I need to find some containers to infuse my oil in. I can start with the container that I want to give the gift in or I can infuse in any sealed jar and transfer to another container before giving. I think that I am going to start small, just to see how the oil turns out. If I like my combinations then I will make some larger batches. Here are the supplies you will need for this project.

Supplies:

Step one: Purchase good quality olive oil and herbs (or pick them from you own garden)

Step two: Find or purchase jars and bottles with a good seal.

Step three: Wash your herbs and let them dry overnight, its the water on the herbs that could have the potential to grow bacteria in your oil, so you want to make sure they are completely dry before placing them into your oil.

Step four: You need to bruise your herbs to release their aromatic oils. To do this you can either gently roll them and rub them with your fingers or gently tap them with a mallet or the back of a knife.

Step five: Place your chosen herbs in the container you are going to use for infusing, then fill with good quality olive oil.

Step six: Seal your container and let it sit in a cool, dark place for 1-2 weeks before using or gifting.

Step seven (optional): You can strain out the herbs after two weeks so they no longer infuse or you can leave them in as you use the oil.

In my containers seen here I have chosen to combine rosemary and oregano in one of the very small containers and in the others I have done rosemary, onion (just the greens on top of the onion) and oregano as stand alone flavors.

Tip: If giving as a gift, I feel that leaving the herbs and spices in the bottle adds to the look of the gift.

At this point if you are giving your oil as a gift you can print out the free gift tags included in this tutorial or make your. Attach the tag with twine or ribbon that matches your container and your ready to present your gift.

Infused olive oil can be used as a gift for many different occasions. Make a few bottles and use it as a wedding gift, grab one out of the cupboard for a last minute hostess or birthday gift. Does someone in your family love to cook gourmet meals? Make set for Christmas or just because.

I think you will find that the most expensive part of this gift is buying good quality olive oil, the rest of the supplies are quite affordable and easy to find. Just remember the higher quality ingredients that you use, the better your infused oil will taste.

Don't forget to visit www.bethannerickson.etsy.com for more printable designs for purchase.

Coming Next Week: Fourth of July: Decorating in red, white and blue

Top