The first day of spring has come, daffodils are blooming andtulips are beginning; all of this means Easter is drawing near! So…. Easter egg hunts, baskets, gifts and celebrations are just around the corner!
I love going to the craft store and buying new craft supplies, but I also find joy in using supplies I have around the house to make something special for that special someone. This blog is dedicated mostly to things I already have on hand and stars another one of my favorite things, mason jars! I am not sure where my love of mason jars came from, but they really are very useful around the house. I use them in the kitchen, for decorations, in my craft room and for gift ideas all the time!
This project falls right in line with a blog I wrote last year about mason jar gift baskets and all the different things you could fit in mason jars to make a unique gift, tailored to the person you were giving it too.
Easter can get really expensive with Easter eggs to fill, Easter baskets to give, eggs to dye, candy to buy, special desserts to make and so much more. So lets cut some of the cost by using some things we already have on hand.
This project really is very simple if you follow these steps.
Step one: Trim your parchment or tissue into a square. You can use any size square that will hang down over the sides of your jar. The size depends on how much you want your paper to hang over the edges.
Step two: Fill your Mason jar with your gifts.
Step three: Separate the Mason jar ring and the Mason jar lid.
Step four: Place your paper square on top of the ring and, press the lid into place allowing the paper to gather at the edges. Screw lid on the Mason jar. Optional version: Print out the mason jar label, trim to fit your mason jar lid, place square sheet of paper on ring, line up your label and lid and place on top of paper. Then, continue as above.
Step Five: Tie ribbon around the Mason jar ring. Attach a gift tag if needed.
Enjoy your Easter season!
Pumpkin Granola and the Art of Hostess Gifts
Hostess gifts used to be the norm along with thank you cards for just about everything from hosting friends for dinner to gifts of all kinds. It seems that these two traditions showing appreciation for family and friends have gone by the wayside. But why has this happened? Are we too selfish to think of others? We think they will cost a lot of money? Are we worried people will think us weird or old-fashioned?
Well, I say who cares what anyone thinks. It’s time to bring these two traditions back to being normal. A hostess gift does not have to cost you a bundle and a thank you note can be sent by e-mail, but personally I think a hand written, mailed note, that someone has taken the time to address, stamp and place in the mail box means so much more!
Thank you cards are very affordable these days with places like Ross, Marshalls, The Dollar Tree and Tuesday Morning. Hostess gifts can also be affordable.
This whole idea of a homemade hostess gift came to me when I was making pumpkin granola for a potluck from a recipe given to me by my sister. As I was putting it in mason jars to take to the potluck, it struck me, if I designed a label and a recipe card to go with it, that it would make a wonderful gift. That’s how this blog post was born. I am including a designed pumpkin granola recipe card along with a blank one with this post. Use it as many times as you like and share it with friends and family. My sister created this granola from a cookie recipe a friend gave her and it was a huge success at my church potluck. Enjoy!
Most of us have mason jars just sitting around our house and they are super easy to fill with some homemade granola, wrap with some pretty scrapbooking paper or one of our mason jar wraps sold HERE and ribbon. Complete these steps and you have a very affordable hostess gift ready to go. Another idea is to include the recipe for your granola on a decorated recipe card. Punch a hole in the card and tie with the ribbon you are using to decorate your mason jar.
Mason Jar filled with the host favorite candy
Mason Jar filled with homemade candied nuts (See Pinterest for recipes)
A bottle of wine or sparkling cider (which can also be decorated with one of our mason jar wraps)
A tin of homemade chocolates or cookies
One Hour Bowl Cozies (as seen HERE) to match the Hostesses kitchen
There are also many handmade items you can give as hostess gifts, a few homemade note cards, a handmade Christmas ornament, a hand-sewn pot holder or dish cloth, a bread basket liner and more.
Let’s join together to bring back the art of hostess gifts this holiday season. Visit our Etsy store to purchase our Mason jar wraps (They can be used to wrap a peanut jar, a mason jar, a bottle of wine or cider and more!) or thank you cards that you can print at home.
More holiday tips and tricks to come in the next few weeks!
Pumpkin Pecan Granola
1/2 cup Pumpkin Puree
1 large egg
1 tsp vanilla
2 1/4 cups oats
1/4 tsp salt
1 1/2 tsp cinnamon
1/4 tsp Nutmeg
1/4 tsp ground cloves
1/2 cup chocolate chips
1/2 cup chopped pecans
1/2 cup dried cranberries
Heat oven to 350 degrees. Combine all ingredients in large bowl until oats are coated, line cookie sheet with parchment, cook at 10 min intervals, stirring between until browned and crunchy, cool and then store in glass containers.
Extra Extra! Father's Day Gift Idea
Father's day is just around the corner and today I was thinking, what ideas do I have that might help those needing a last minute gift idea for dad?
That's when it came to me! Why not use my mason jar wrap available at www.bethannerickson.etsy.com to wrap a jar of peanuts, a wine bottle, a jar of salsa or bag of coffee beans or fill a mason jar with his favorite candy. Really anything could be wrapped with one of my mason jar wraps to make into a personalized gift for Dad. There are so many ideas I could go on and on!
As I think about it, my dad has practically everything he could want. Does he really need another bbq set, car wash kit, or some trendy gift item he might never use? No! But I do know that every Dad has a snack food or a drink that he loves, that he would buy for himself. Why not make it into a Father's Day gift?
My mason jar wraps are affordable and easy to purchase and download on Etsy.
Supplies Needed:
Jar of Peanuts or other gift item
Printer
Scissors or paper cutter
Tape
PDF of Mason jar wrap
Step one: Purchase and print the mason jar wrap
Step two: Trim the wrap to size
Step three: Wrap around the gift item and tap in place
Three very simple steps and you have the perfect gift for dad!
Visit www.bethannerickson.etsy.com to purchase one of our very versatile mason jar wraps today and create your own unique gift for dad!
The Art of Mason Jars...
... And Chalkboard Paint
I recently started drinking loose leaf tea, which means I need some where to store my different varieties. So I started brainstorming and hit on this idea, mason jars! I have plenty of them just sitting around my house. The perfect solution to my dilemma, I will store my tea in mason jars. But wait, I need to know what tea is in my jars. How will I label them? And it came to me, chalkboard paint and chalk, then I can easily change the name on the jar when I buy a different flavor of tea. There is also bulk spices, bulk foods, coffee beans, buttons, string, craft supplies and more that I need to store and label. Being a crafter I keep all sorts of things thinking, “oh these will be useful in the future,” but where to store them? What better to use than a mason jar!
Mason jars and chalkboard paint, are both very trendy right now. You can find them in any craft store, grocery store or one-stop shopping center and most people have mason jars or some sort of empty jar sitting around their house that can be put to good use. So don't think you have to go out an buy a mason jar to put this tutorial to use. You can use any jar with a metal or plastic lid for this project. Here are the supplies you need and 4 very simple steps to complete this project.
Step One: You need to decide where you would like to label your mason jar. Do you want the label on the front, on the lid or both.
Step two: Clean the insert and the mason jar in warm soapy water.
Step three: Painting
Painting the lid insert: Apply and even coat of paint to the entire surface and let dry. Then repeat, to make sure you have a good coat of chalkboard paint.
Painting the jar: Using your tape or stencil, mark out the area you would like to paint. The smooth areas work best. Apply a thick coat of chalkboard paint to the desired area, make sure to remove any tape before it dries or your paint will peel.
Painting a plastic or metal lid: For these lids you can choose to paint the entire lid, top and sides or you can choose to paint a circle on the top in the center, leaving the sides un-coated. Once you decide, paint it as you would a mason jar lid insert.
Step four: Fill your mason jar with the items you would like to store and label with chalk. Make sure you paint is completely dry before you label it. Also, its best to use your chalk on some paper first to get a smooth tip on it. If you press to hard you will scrap off your chalkboard paint. So be very careful.
As you can see from this photo the chalk wipes right off with a damp tissue, so that you can re-label your jar.
See, that was a very simple project. It was creative and helped you organize your home at the same time! You can apply the steps in this project to any glass or plastic container you use around the house that you want to be able to change the label on.
Next Week: I am on vacation in the Redwoods to celebrate my one year anniversary with my wonderful husband Michael. I am sure I will have many new creative ideas when we get back from our trip to share with you and I will be sure to share some photos and stories from our adventures. Also check out my tutorials on www.instructables.com along with many other great tutorials.
Wedding Dreams:
The art of coordinating your wedding theme
This week I thought it would be fun to give brides-to-be some ideas on how to coordinate the theme of their wedding all the way from save the dates, invitations, decorations, hair & make-up, to what to wear. Our theme for the purposes of this blog, will be a rustic wedding. Currently a very popular choice among brides, but sometimes hard to coordinate through-out the entire wedding, but I have some ideas on how to help with that. I am also very excited to introduce Molly of Lovely You By Molly, she will be contributing to the blog with the hair and make-up portion along with some wonderful hair tips for the day of the wedding!
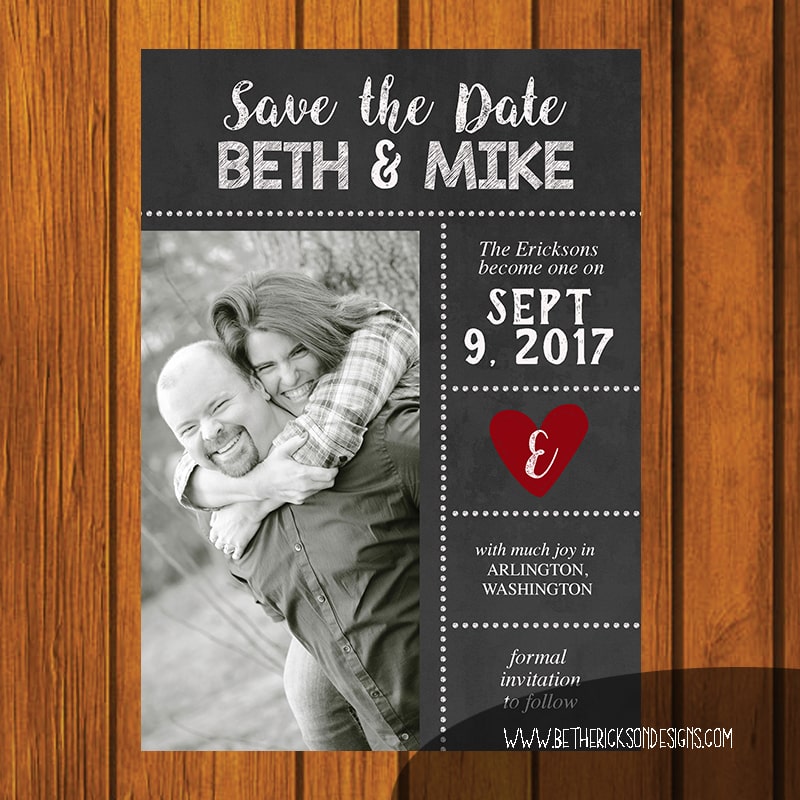
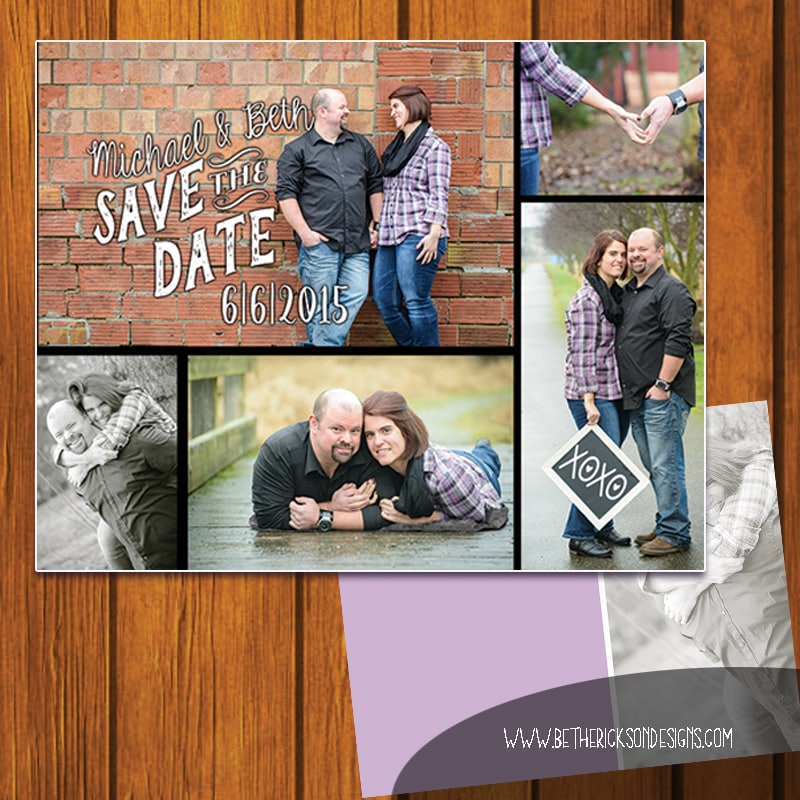
A rustic wedding can be formal-rustic or casual-rustic. So, your first choice would be what direction do you want to take? After choosing your direction, it is then time to look for your save-the-dates and invitations, along with choosing your color combinations. Most people don't realize that your invitations and other printed items can help set the mood for your special day, along with decorations, clothing options, hair and make-up. Its a good idea to use your save-the-dates and invitations to give your guests a small taste of what the day will be like.
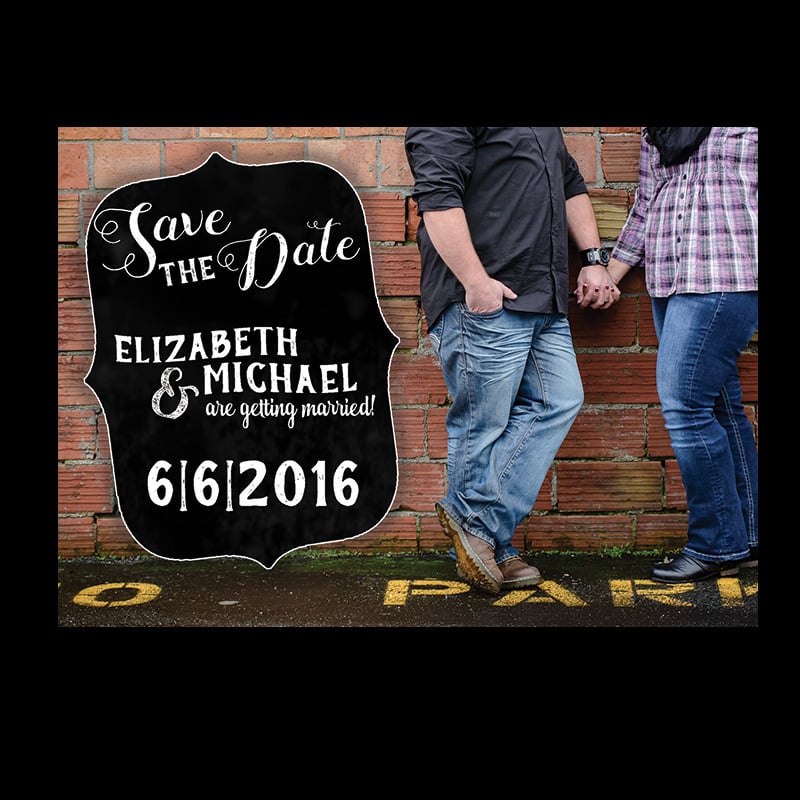
What things convey a rustic wedding theme? Well there are quite a few things that do this. Some ideas would be, wood backgrounds, mason jars, lanterns, chalkboards, brick walls, wood rounds, logs, stumps, wildflowers, cowboy boots, jeans and much more.
Save-the-Dates and Invitations
Here are a few examples of rustic save-the-dates and invitation sets. These are available for purchase at www.bethannerickson.etsy.com. As you will see below, these use lots of wood backgrounds and a mix of chalkboard fonts and formal script fonts. There are many more styles to choose from on Etsy and they can be created in any color combination you choose.
Attire, Hair and Make-Up
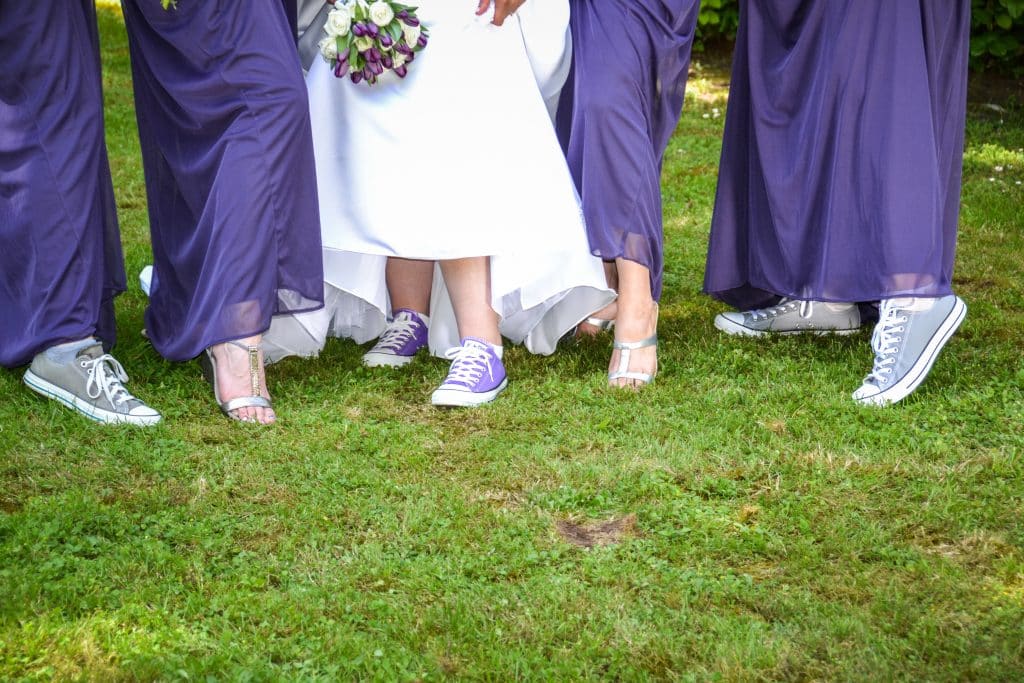
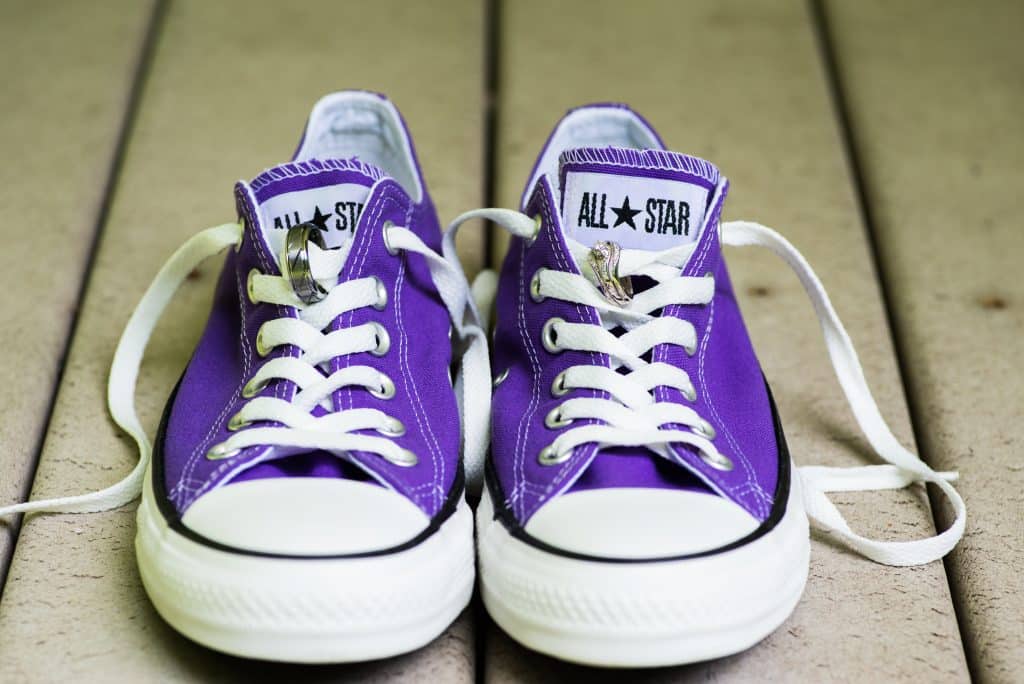
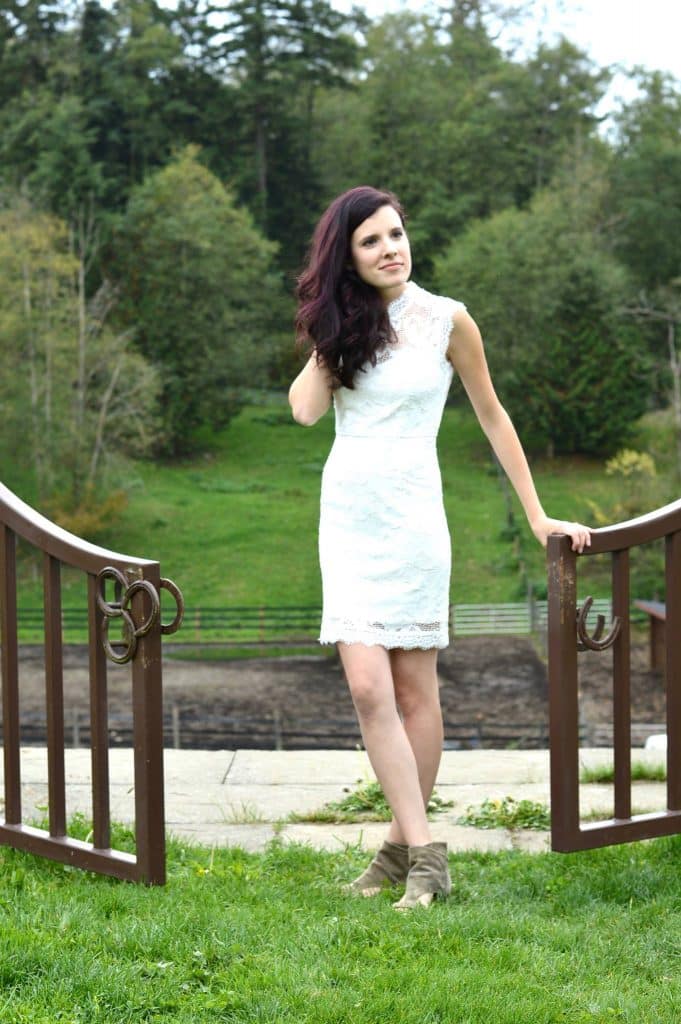
The next step would be choosing what your wedding party will wear on the special day and testing out possible hairstyles and make-up options. Some ideas for rustic attire range from, trendy jeans, dress shirts and cowboy boots for the guys to short/medium length dresses and cowboy boots for the girls if you are choosing the casual side of things. For my own wedding which was a purple and silver wedding with rustic tones, we chose more formal clothing, but wore Converse to bring in the casual side of things. The bride could wear a long or short dress, or a sundress with a choice of casual foot attire. Here are a few pictures to give you some ideas.
Now I will turn the blog over to Molly for the hair and make-up portion, picking back up when she is finished.
Hi Lovelies! My name is Molly and I was pleasantly surprised when Beth asked me share some tips for Brides on how they might incorporate a rustic style in their hair and makeup for their wedding day. Let me share a little bit about myself before we get to the details.
I am a licensed hair stylist and makeup artist for weddings and events. I own my own business called Lovely You by Molly. I have two sweet kids, a 4 year old daughter and a 1 year old son. I own a cleaning business as well but the hair and makeup is definitely my favorite. It is a joy to be a part of someones special day whether it’s their wedding day or headed to prom. I love it when I see a huge smile on a client’s face after they look in the mirror, with the style they have always dreamed of.
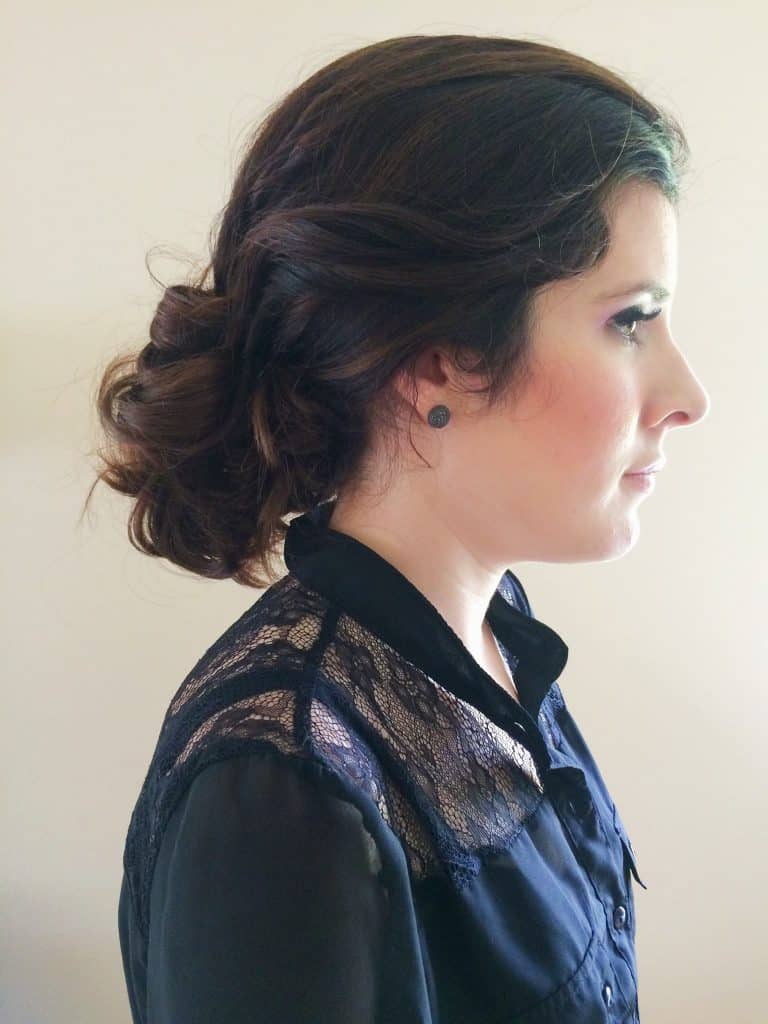
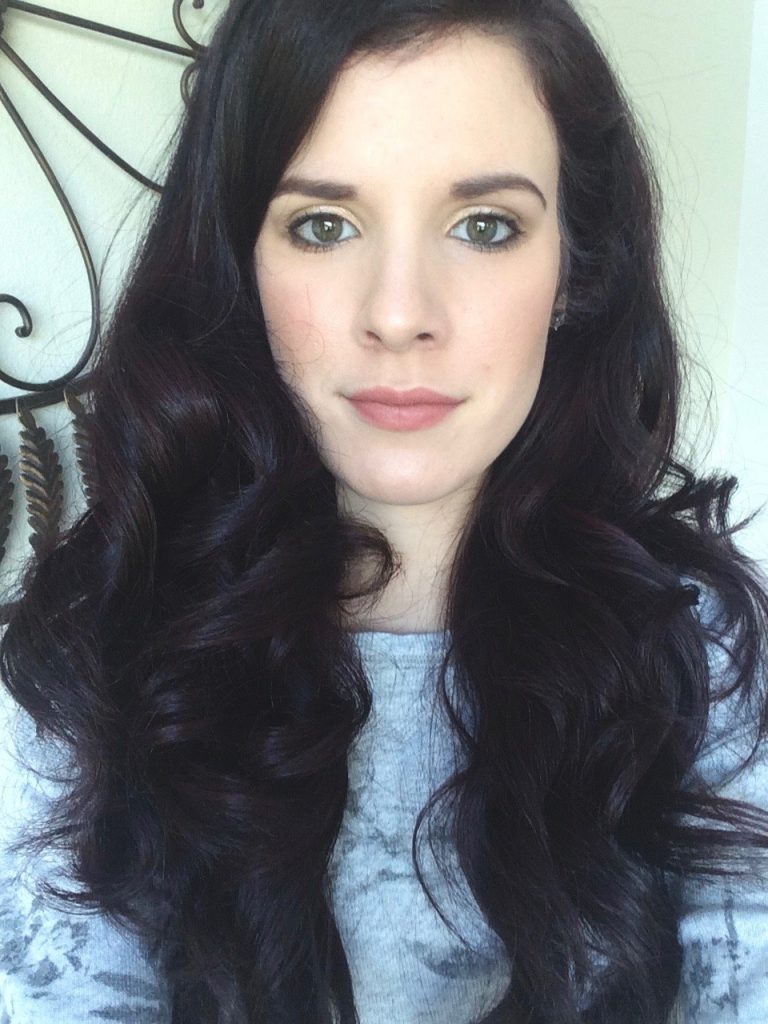
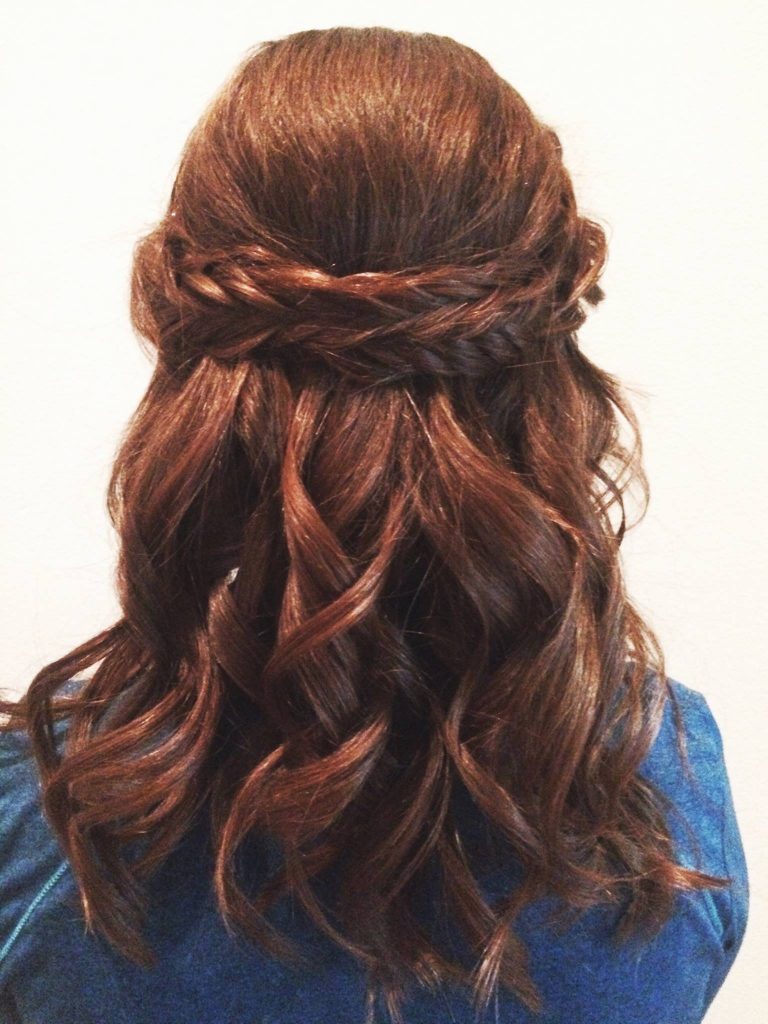
Back to this rustic theme, What are some good looks if you are a bride planning this style of wedding? Words that come to my mind for hair are loose waves, braids, and an effortless look. For makeup, I think of natural, warm tones and a soft look. Here are some photos of some styles I have created to get you thinking. The last one is a combined hair and makeup look on myself:
Lastly, I wanted to share three tips for Brides as the plan their wedding day style:
1. Choose a classic and timeless look. When picking a hair and makeup style, try to always have in the back of your mind, is this something I will be happy looking at a few years from now, as I browse through my wedding photos? Save the trendy looks for a date night or even your engagement photos but on your wedding day, pick a style that reflects the elegance of a bride.
2. Dry Shampoo is your friend. Dry shampoo is a great starting point for any style, to create volume and texture, especially for Brides who have fine hair or tend to get oily. You will be amazed at the difference it makes.
3. Create variety in your curls. When curling your hair, alternate the direction of each curl. You will get more of a natural look doing this. It also helps your hair to not bunch together into “one” big curl as the day progresses.
Thanks for reading and I hope these tips helped you become inspired about a beautiful, rustic wedding theme. Come find me on instagram @lovelyyoubymolly as well as Facebook, www.facebook.com/lovelyyoubymolly. I would love to get in touch!
Thank you Molly for all those wonderful suggestions.
Decorations
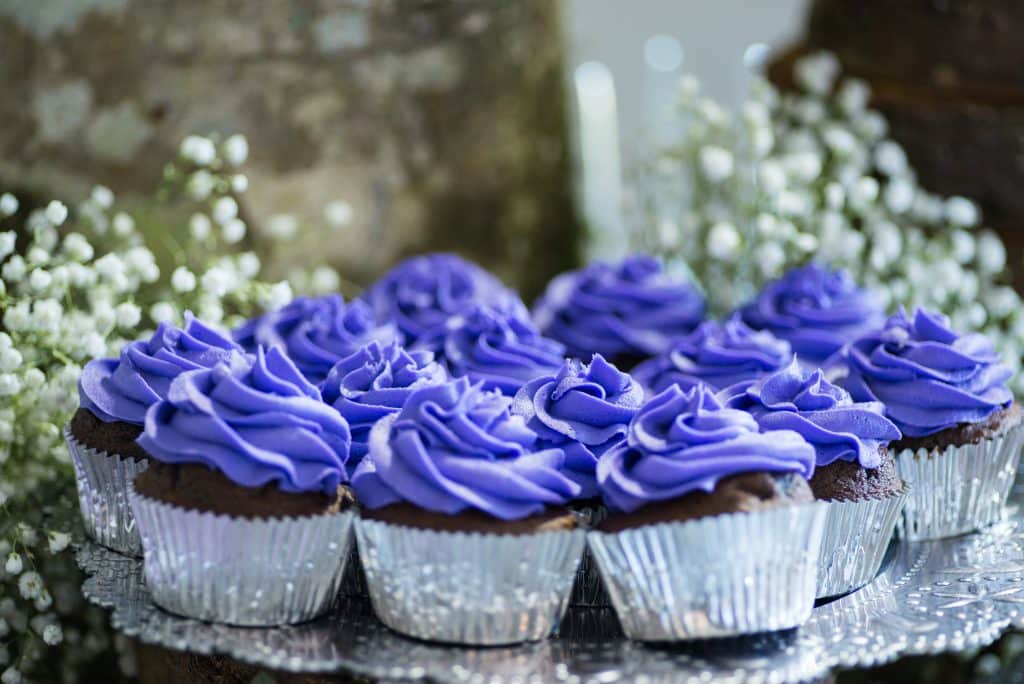
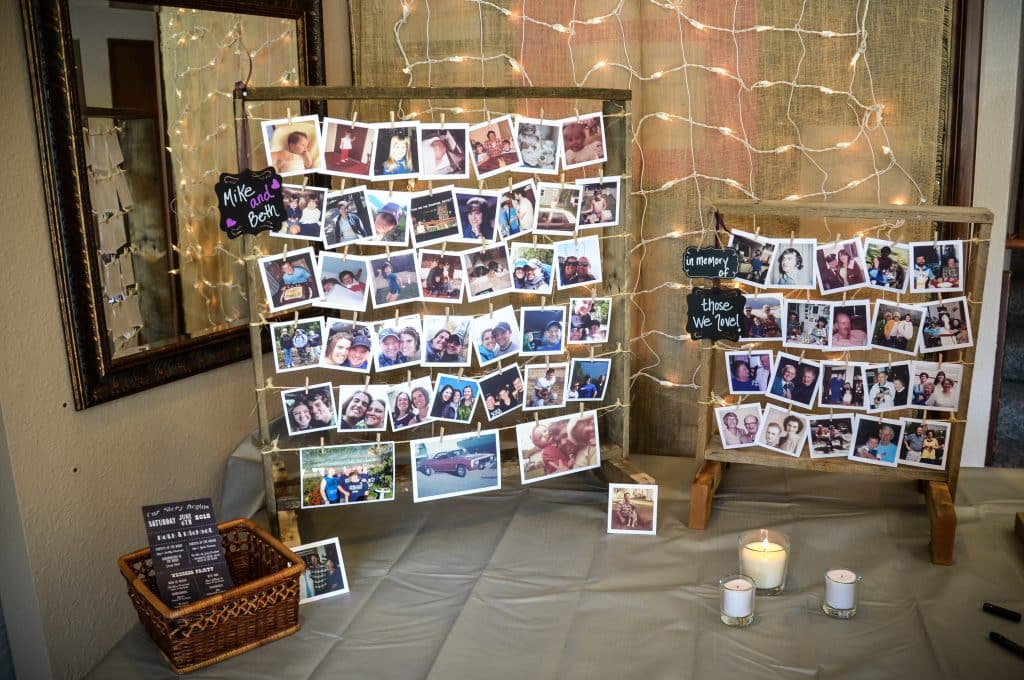
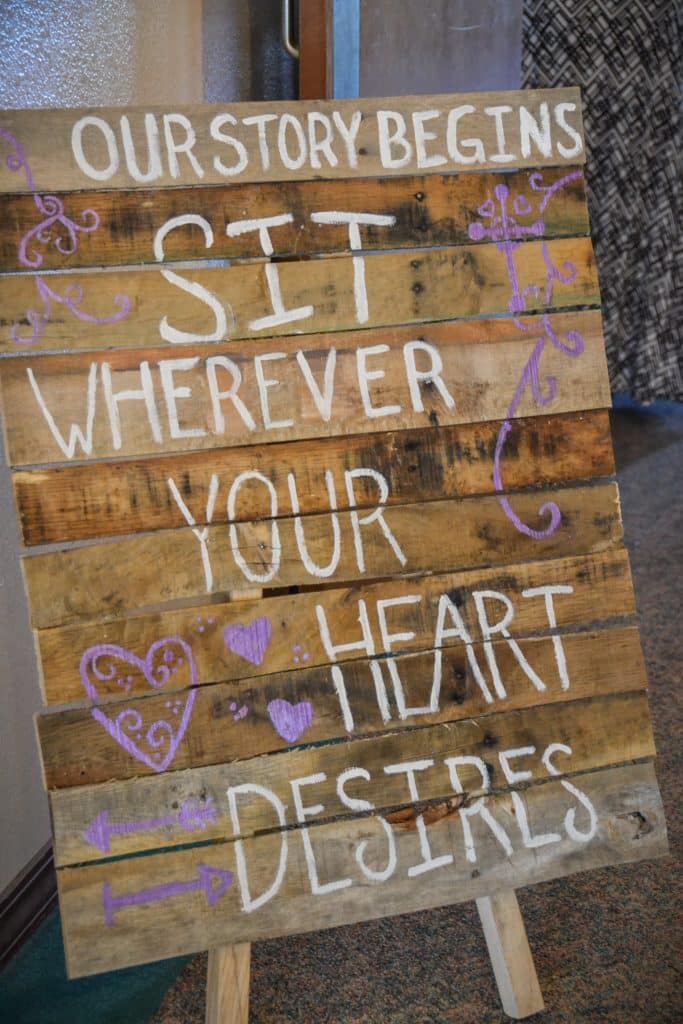
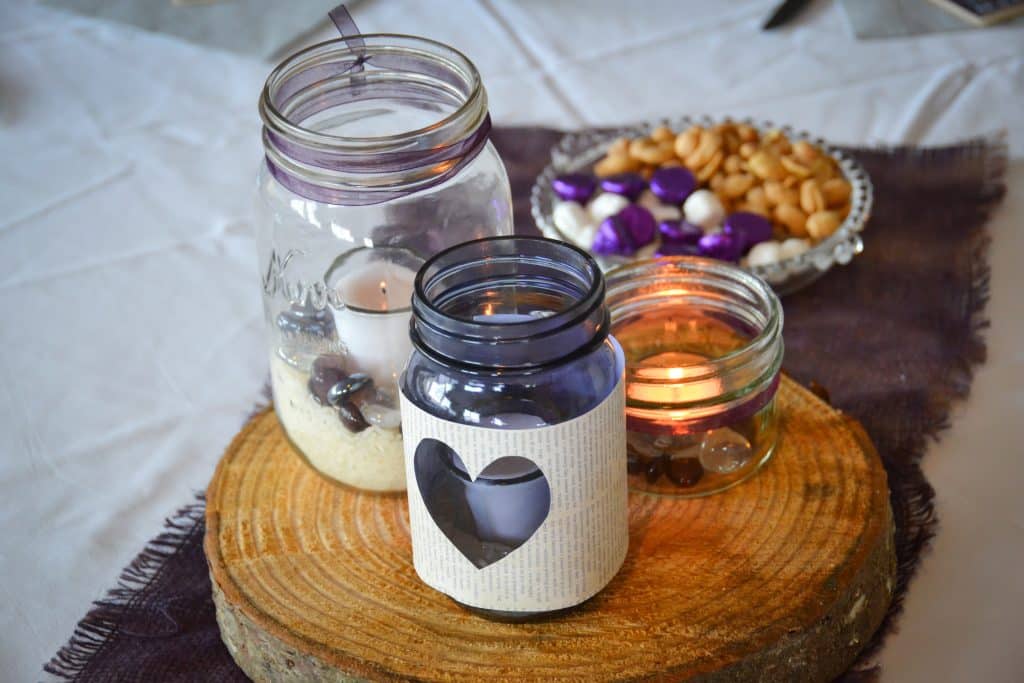
Next up, decorations! Decorations for a rustic themed wedding really are very simple. To complete this theme, use lots of wood, pallet boards, lanterns, mason jars, burlap, candles and lace. Popular right now are wood rounds for center pieces with mason jars or lanterns placed on top. Wrapping the mason jars with burlap, twine, vintage looking paper or lace adds an extra rustic feel and is fairly inexpensive to accomplish. Here are some photos of decoration ideas. If you have any questions on how to accomplish these looks feel free to ask me.
To wrap things up, once you choose your wedding theme, coordinating that theme throughout your wedding is really very simple. If you choose a floral theme, look for invitations with your favorite flowers on them, choose a long flowing dress, and bouquets of beautiful flowers. You could use flowers in your hair and have the pocket squares for the grooms be a fabric with an underlying flower texture. Use an arbor in the ceremony with flowers affixed to it and centerpieces with the same flowers arranged around candles or lanterns.
Some current trends in wedding themes are bohemian, floral, fantasy, fairy tale and rustic. If you search for these online you will find a many great ideas! But don't overwhelm yourself by trying to do everything you see, just pick and choose what you absolutely love. I really hope this helps you coordinate the wedding of your dreams. For ideas, suggestions or to hire me to help decorate your wedding, just contact me.
Coming Next Week: Wedding Memories: The art of creating a shadow box
The Art Of Cold Brew:
A Product Review
The art of making cold brew coffee is a simple task and very easy to accomplish at home. Especially if you have a cold brew coffee filter from CoffeeSock Co.! I received my cold brew coffee filter in the mail a couple of weeks ago and I have been trying it out ever since and my husband Michael has been enjoying the cold brew on his way to work in the mornings.
At first, I was unsure if I would like the cloth filter from CoffeeSock. In the past I have used cheesecloth to brew the coffee, which allowed for quite a bit of sediment to escape from the filter into the coffee and was a hassle to clean up in order to re-use the cheesecloth. I was worried I was going to have the same experience with this new cloth filter, but I was pleasantly surprised that this was not the case at all! CoffeeSock's filter was very easy to clean up and as far as sediment goes, there was practically none in the finished product!
The art of making cold brew is a very simple process and easy to do at home. First I would recommend that you visit, www.etsy.com/shop/CoffeeSockCo and purchase one of their cold brew coffee kits or if you already have a mason jar at home purchase one of their cold brew filters.
Next, purchase some whole bean coffee, regular or decaffeinated, I prefer dark roasts, and grind it at the store or at home to a coarse grind. Then place your coarse ground coffee in your CoffeeSock filter and wet the grounds so that they bloom. (CoffeeSock Co. also has these instructions on their packaging for you). Then, close the filter with the strip of fabric at the top by wrapping it around the top of the filter a few times.
At this point, place your filter in your mason jar and fill with cold water. I prefer to leave the glass ring hanging over the top of the jar, so that its on the outside when I close my jar. Another way to complete the process is to put the glass ring around the top of the filter and then submerge the filter in the cold water and put the lid on your mason jar.
Allow your coffee to soak for at least 8-12 hours, remove the filter and its ready to drink. Prepare however you prefer your coffee, cream, sugar, or flavored syrup. You can even microwave the cold brew if you prefer hot coffee. The benefit of cold brew is you get a smoother coffee than with hot brew.
CoffeeSock Co.'s reusable organic cotton DIY cold brew kit (www.etsy.com/shop/CoffeeSockCo) makes the perfect gift for the coffee lover in your life! Their kits are also the perfect start to one of our mason jar gift baskets, just add some coarse ground coffee, flavored coffee syrups, a shaker of vanilla or cocoa power and one of our mason jar wraps available at www.bethannerickson.etsy.com and you have a personalized cold brew gift basket ready to give. For more mason jar gift ideas visit our blog post The Art of Mason Jar Gifts.
I highly recommend CoffeeSock Co.'s organic cotton filter for yourself or a friend!
Bonus Idea:
By experimenting with my organic cotton filter from CoffeeSock, I found that I could brew a large batch of tea, using hot water and a mason jar to make iced tea. I used a berry flavored tea and then added some lemonade to sweeten and refrigerate. Perfect for the Mother's Day BBQ I hosted on Sunday. There are so many uses for your CoffeeSock organic cotton filter that its worth the purchase, even if you are not a coffee drinker!
Coming Next Week: Wedding Dreams: Coordinating the theme of your wedding.
The Art of Mason Jar Gifts
Happy Wednesday! This week I want to share with you how to create your own mason jar gift basket! Gift giving is an art and to give the perfect gift you must think about the person you are giving it to and what they might enjoy. What could be more perfect than filling a mason jar with gifts chosen just for that person.
In the following tutorial I will give you a few ideas on how to create a mason jar gift basket. But the sky is the limit, well actually the size of the mason jar would be the limit, have fun and think outside the box, or should I say jar.
Step One: Purchase your mason jar in any size you would like to fill. Michaels, Hobby Lobby, and Wal-Mart, among many other stores, are good places to find these. If you are like me you already have dozens around your house.
Step Two: Visit www.bethannerickson.etsy.com to purchase a pre-designed mason jar wrap. The wraps are instant downloads that you print at home and then wrap around the outside of the mason jar to help set the tone of your gift.
Step Three: Trim the print to the correct size, tape one end to your mason jar and wrap around until it meets the other end and tape together to hold in place. (At the time of writing this tutorial our mason jar wraps did not fit around the quart size jars, we have now added a 14 inch file to all the listings on Etsy, but you will need a printer that can print on larger paper than 8.5x11 to be able to use them.)
Step Four: Fill your mason jar with the appropriate gifts for the recipient.
Examples :
Pedicure Kit: Nail polish (1-3 bottles), nail clippers, nail file, toe separators and any other nail care items you think they might enjoy.
Movie Night (Men and Women): Candy, popcorn, popcorn seasoning shaker, gift card to purchase a new movie.
Coffee Lover (Cold Brew Set): Cold brew Mason jar kit (Can be purchased at www.etsy.com/shop/CoffeeSockCo. A special thanks goes out to CoffeeShock Co. for offering to send me a ColdBrew filter to try out. As soon as I receive it I will post a blog about how it works and pictures of a completed Coffee Lover Gift Set.), coarse ground coffee, mini bottles of coffee syrups or simple syrups. (There are various recipes online for making your own simple syrup coffee flavors. They are also sold on Etsy.)
There are so many more ideas; I could go on and on. I am sure you can come up with your own unique ideas. The key to the art of giving: It’s all about the recipient! Who are they? What are their hobbies? What do they enjoy? Focus on them and your gift will turn out perfect.
Thank you so much for reading our tutorial and don't forget to sign up to receive the blog in your inbox each week and we will send your a discount code good at our Etsy shop. Visit www.bethericksondesigns.com//beth-ann-erickson-designs to sign up!
BONUS IDEA:
Another wonderful use for mason jars to save money for special trips and/or purchases as shown in the example here of our Road Trip Fund Jar.
Coming Next Week: Mug Love: Mug Cakes as Gifts & more (WITH A FREE DOWNLOAD).