How To Save Paint When Paint Pouring

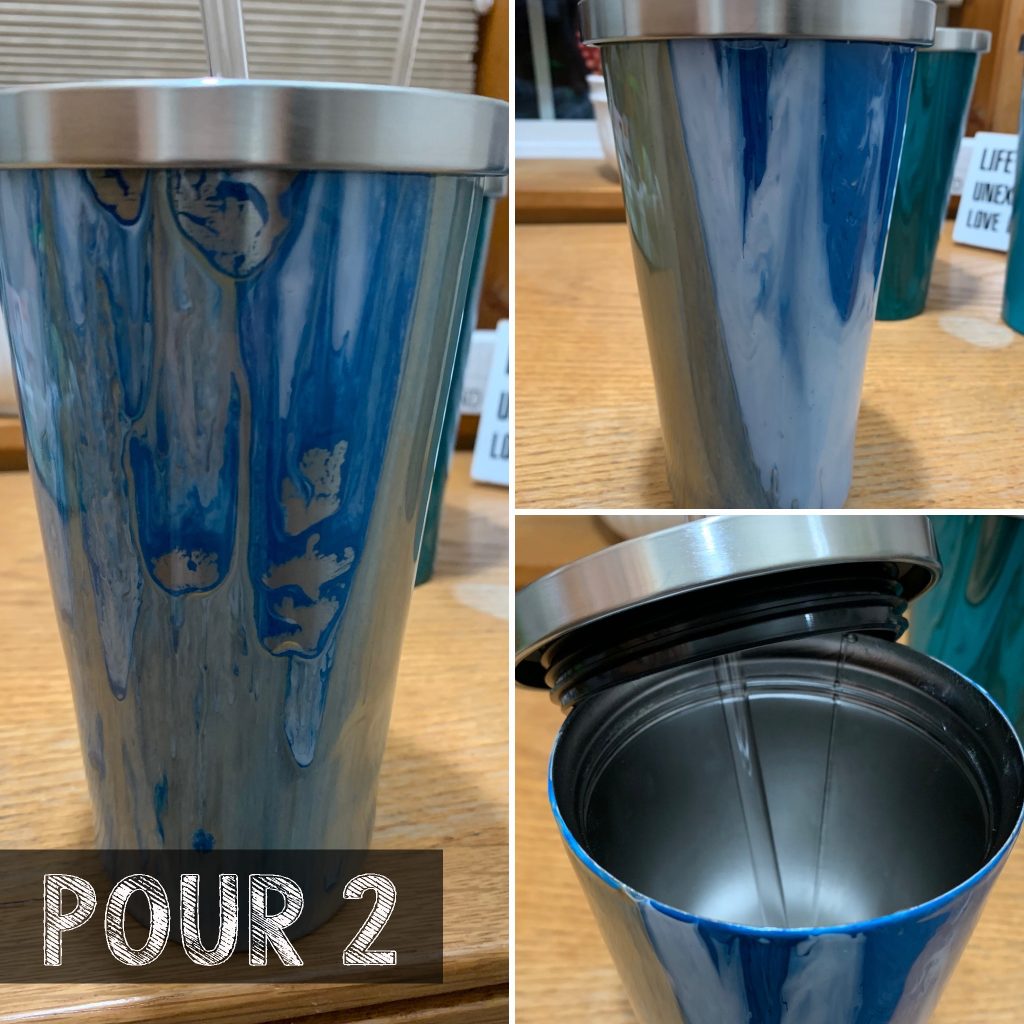
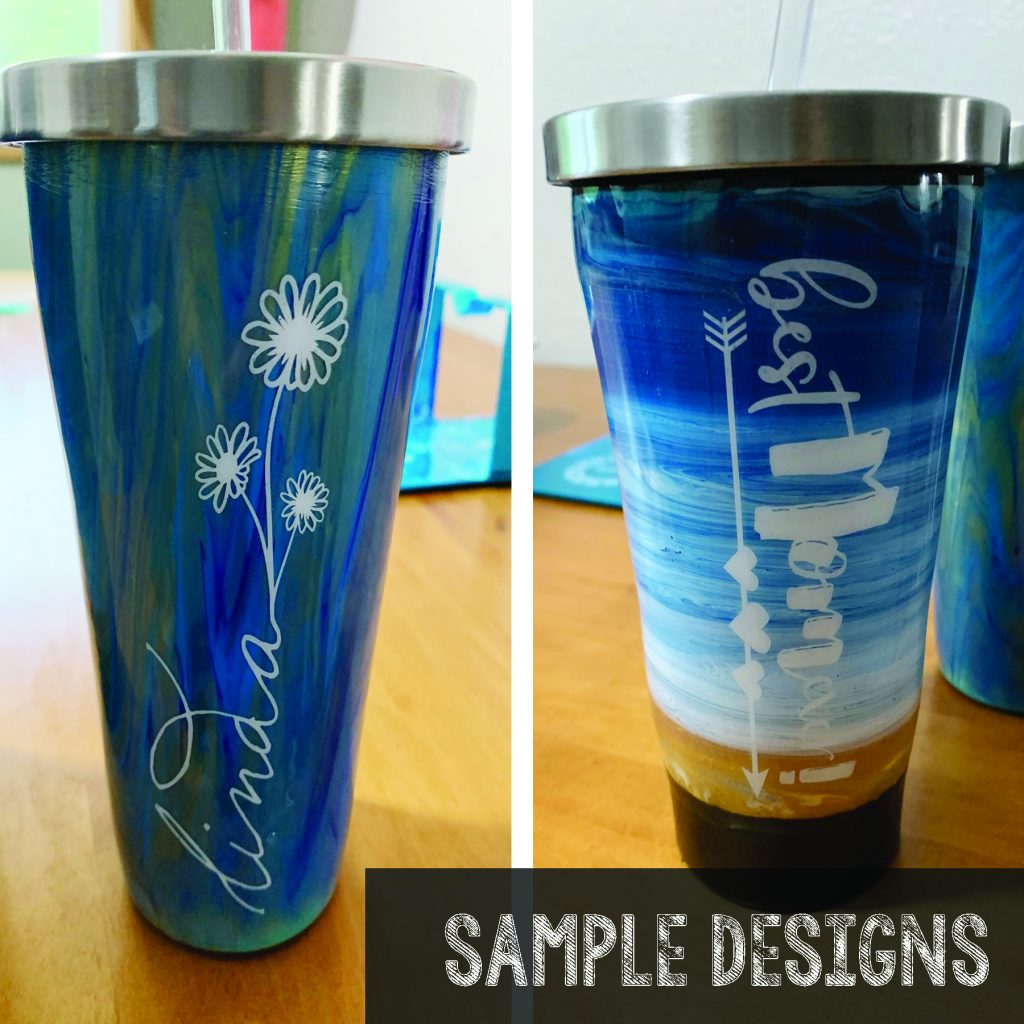
When painting tumblers with acrylic paint, a lot of the paint drips or spins off of the tumbler. In today’s video I will show you a technique that allows you to save almost all of the extra paint and create another piece of art with it.

In today’s video, we will paint a tumbler on a mug spinner with acrylic paint while its spinning and allow that paint to drip off onto a liquid panel. In the end we will get a beach scene on both the panel and the mug. Not only do you create to pieces at one time, you save time, money and paint. Let’s get started with the supplies you will need and then move on to the video!

Supplies Needed:

Video:

After your mug has dried, you will need to coat it with resin. You can watch how I do that in this video.

Tutorial: Applying resin to a tumbler

In this video tutorial I will show you my method of applying resin to tumbler while it’s spinning on a mug spinner. (We painted a tumbler in this previous video.) When I was learning to apply resin to my tumblers, I took a few missteps along the way and I am hoping that my video and technique can help you avoid those same missteps.

If you follow my tutorial, you will find that this process is quite simple, you just need to be patient and keep working the resin until you are confident that the mug is completely covered with an even coat. Here is the supply list you need for this tutorial.

Supplies:

After you gather all your supplies, watch the tutorial here. I hope this video helps you create some wonderful and that you find it very help.

Acrylic Dirty Pour Beach Scene

Beginner Tutorial

Hello again! Thank you for joining me for my tutorial on how to use a dirty pour, a panel with sides, and a straw to blow the paint to create an abstract beach scene.

This is a paint pouring project that even a beginner can accomplish! It only takes about 5 different paints, a liquid painting panel, a cup for mixing paint, and a straw to move the paint around with your breath!

Here is my list of supplies with the instructional video to follow!

Supplies:

Once you have all your supplies together, watch the video for all the step-by-step instructions! I hope this tutorial helps you create something beautiful.

Tutorial:

Acrylic Paint Poured Tumbler on a Cake Spinner

Welcome!

I am so glad you have joined me for my first ever video tutorial! If you want to follow all my videos and stay up-to-date with what’s happening at Beth Erickson Designs, be sure to subscribe to our mailing list and our YouTube Channel.

Today’s tutorial is an acrylic poured tumbler that I spin on a cake spinner after placing the paint on the bottom of the upside-down tumbler. In this video you will see my successes, challenges, and fails! I am willing to share all of these with you so that you can be reassured that in art things don’t go smoothly all the time and the beauty of the final outcome is found in the challenges and fails! Even though we encounter some problems along the way throughout this video, we still end up with an original piece of art.

All of the instructions for this project are located inside the video, but I will list the supplies needed and links to where to purchase them here, so that you can gather all your supplies before watching.

Supplies Needed:

Enjoy, be inspired and create something awesome. Shop my paint poured tumblers here.

Top Three DIY Easter Crafts

We are just few weeks away from Easter and I thought this would be the perfect time to review my Easter tutorials and DIY projects.

Today I will provide links to my top three tutorials from previous years and talk about two alternative ways to decorate Easter eggs (with links included).

My sister and I are going to dye Easter eggs again this year and I thought it would be fun to try two new ways to decorate our eggs (highlighted below). After trying these I will be writing a blog evaluating each process. My goal is to help direct you to the process that will work best for you and your family.

In March of 2017, I wrote three blogs on Easter gift ideas and DIY decorations.

Mason Jar Easter Gifts

The Mason jar Easter gifts gave you new and creative ways to package your Easter gifts. Also included was a free download (which is still available).  This tutorial can be found here along with the free download.

DIY: Rustic Easter Carrots

That same month I wrote another tutorial on making rustic twine carrots which can be used in Easter/Spring decorating around your home. I enjoy decorating for a variety of holidays and hope some new ideas will encourage you.  Find the Rustic Carrot tutorial here.

DIY: Easter Garland

Then we also enjoyed a tutorial on how to make your own watercolor “Easter Egg” garland, which is a perfect project to do with your children or in a classroom. In this tutorial we painted traced “egg” shapes with watercolors, cut them out and punched holes in them. Then we attached ribbon to make a garland. This idea would also work well for Easter gift tags or greeting cards. You can find this tutorial here.

Alternative Egg Decorating Ideas

There are two alternative egg decorating ideas that I am going to explore this year. One involves bleeding tissue paper and the other shaving cream! Both of these directions give you multi-colored Easter eggs and they look like they might be easier for young children and less messy than traditional methods (no cups of dye to knock over or splash on your neighbor, counter or kitchen table).

The first tutorial uses shaving cream and food coloring. All the steps are outlined here on www.athriftymom.com.

Next up is dying Easter eggs with tissue paper. The key to this one is buying “bleeding” tissue paper - the only type of tissue paper that will leave colors behind on your eggs. You can find the complete step by step process here on www.thecraftyblogstalker.com.

I will post my evaluations and pictures of the new processes soon, so look for that coming up. Until then enjoy the Easter season and find joy in the fact that spring is upon us!

DIY Event Table Numbers

When planning a wedding or special event; you want everything to be perfect. You probably feel like you will spend any amount of money it takes to have the perfect day, but you will soon realize that your budget can’t afford that expense. So why not recruit some help from family or friends and spend some time making a few of the items for your wedding or special event? You will have fun and save money at the same time.

One project that can be simple to complete is table numbers that hang from a bottle of wine or sparkling cider. These table numbers are constructed from Mason jar bands and lids, paper, a printer, watercolor paints or scrapbook paper. In this tutorial I will go over a few different ways to complete these fun table numbers. You may also choose to purchase my affordable pre-formatted table numbers as an instant downloads on Etsy (here).

If your not using wedding table numbers you can also use this same idea to provide information to your guests. For example: “We can’t wait to hear your glasses clink, please wait for the toasts to enjoy this drink!” or “Please wait for the wedding toast.”

Some of these options are also available for purchase on Etsy (here).

Here’s the supply list and step-by-step instructions and photos (You can find most of these supplies at Amazon or the Dollar Tree):

Step One: If painting on watercolor paper, trace the size of lid you’re using on the watercolor paper, paint with watercolors, let dry and then either brush on your text or table number or write with a sharpie. If using a printed background, print it on your paper. Trace circles of the correct size onto the paper, hand letter your number or text. If using scrapbook paper, trace your circles and write message or table number where desired. If using the instant download, purchase here, download, and print on the paper of you choice.

Step two: Trim circles to correct size.

Step three: Coat lid and backside of circle with Mod Podge and adhere to the Mason jar lid. Then coat the top of the print with Mod Podge and allow it to dry.

Step Four: Tie your twine or ribbon around the Mason jar band as shown.

Step Five: Once dry, heat up your hot glue gun and run a line of hot glue around the inside of the Mason jar band as shown above. Then quickly place your Mason jar lid into the ring picture side down and press until hot glue cools

Step Six: Make hot glue “tab” on the backside of the band and lid as shown here to make sure your lid stays in place. Let hot glue cool. Remove glue strands, if any hanging from the finished piece.

Step Seven:  Hang your creation from wine or sparkling beverage bottles as shown. You’re done!

Wow! Wasn’t that simple. It didn’t take much time, you saved money and it added a personal handmade touch to your wedding! I would love to see photos of how you used this project at your event or wedding!

For more tutorials and inspirational thoughts visit www.bethericksondesigns.com.

Sign up for our product updates and special offers at our Etsy Shop here.
Affordable DIY Watercolor Valentines

I don’t know about you, but I find Valentine’s Day to be a fairly expensive holiday.   A card for your hubby or significant other, a package of Valentine’s for your child’s classmates, Valentine’s Day gifts and cards for your children, friends and family and you could end up spending more than you ever wanted to. So, lets make Valentine’s Day affordable, fun and show a lot more love to those special people in your life by making our own Watercolor Valentines!

I know what your thinking! “I could never paint a watercolor Valentine! It won’t turn out and I will just end up throwing it away!” Not true! Anyone can do this project, even your children! You don’t have to have any fancy supplies. All you need is a set of children’s watercolor paints and paper you have around your house!

So, lets dive in and give this a try. Will you join me? Our first step is to hunt around the house or at the Dollar Tree  (I love the Dollar Tree especially is you are making these with your children or Elementary School class) and find the supplies listed below, then we will get into the heart of making these fun, original Valentines.

Supplies:

Optional Supplies:

Step One: Trace your heart shaped cookie cutter onto the cardstock.

Step Two: Mix the color you want to paint and some water together on your pallet. Adding more water to your color will make it lighter and more of the paper will show through.  Continue adding layers of color until you like what you have. You can try a pattern like polka-a-dots or stripes.

Step Three: Let your paint dry thoroughly

Step Four: Cut out your heart shape

Step Five: Embellish your Valentine by adding glitter, stickers, and your message with a permanent pen. Mount it on another piece of card stock or a folded piece of card stock. Find envelopes to fit and your ready to go!

And there you have it! A very simple and affordable way to make a special Valentine for someone important in your life! Thanks for joining me! I would love to see your handmade valentines!

For more tutorials and inspirational encouragement visit www.bethericksondesigns.com.

Long-lasting Bouquets: The Art of Paper Flowers

Spring and Mother's Day are just around the corner and these paper flowers make a great spring decoration or a centerpiece for your Mother's Day brunch. The great thing about these bouquets is that they last longer than live flowers and since you will probably have most of the supplies around your house, they will be cheaper too! If you don't have the supplies at home I will provide a supply list for the Dollar Tree and Amazon, so you can choose where you want to shop.

You can make paper flowers out of just about any paper you, different patterns and colors allow for variety in your bouquet.  The bouquet pictured above has a few types different paper flowers in it, some that are folded Origami and the ones we will learn how to make in this tutorial.

As I was researching online, I found many tutorials on how to make the bloom of the flowers but no one included how to attach a stem. This tutorial includes both parts of the flower, the paper bloom and a wire stem.

Amazon Supplies:

Dollar Tree Supplies:

Creating the bloom:

Step One: Choose your paper

Step Two: Cut circles of varying sizes out of your paper.

Step Three: Cut a spiral from the outside of your circle to the center leaving an area in the center for the base of the flower.

Step Four: Roll your flower from the skinny outside point to the center, starting your roll around a very small dowel or bamboo skewer.

Step Five: Once you have your paper flower rolled to the center, let the flower expand to the desired size. After you have your desired size, place a circle of hot glue on the base of the flower and press the center into the hot glue to hold it in place.

Adding a stem to your paper flowers:

Step One: Cut your desired length of crafting wire (cut them longer than you think you need so you can trim to adjust the height of your flowers as you arrange them in your vase)

Step Two: Roll one end into a tight spiral

Step Three: Bend spiral to a 90 degree angle

Step Four: Place a circle of hot glue on the base of your flower

Step Five: Press the spiral into the hot glue and then place more hot glue over the top

Step Six: Hold until dry

To arrange my paper flowers I filled a small vase with glass marbles and then inserted my wires stems into the glass marbles, moving them around until I created the desired arrangement.

For more tutorials and inspirational encouragement visit www.bethericksondeisgns.com.

Painting SuppliesPaper Crafts Supplies

Drawing Supplies

For The Love Of Mason Jars

6 Mason Jar Tutorials Revisited

Maybe it’s just me, but I am obsessed with Mason jars. I am always looking for a new way to use them and I am still coming up with a few new ideas here and there! With the beginning of the New Year, I thought this would be a good time to revisit six of our previous Mason jar tutorials, along with a few new ideas and a glimpse into coming tutorials.

We have touched on how to use mason jars for gifts, storage and how to use the lids and rings to create unique memories for your Christmas tree.

But first a little Valentines Day treats! New to the Etsy shop are two instant downloads that can be used on a Mason jar or a milk bottle to make a sweet treat for your special someone! These downloads are designed to match two candies, Reese’s Pieces and Red-hots! Click the images above to purchase the download and complete your own Valentine’s Day project. Then read on to review our previous Mason jar tutorials and find on that fits your needs.

Tutorials revisited:

  1. The Art of Mason Jar Gifts • Using Mason Jars as gift baskets.
    (www.bethericksondesigns.com/allthingscreative/2016/4/25/the-art-of-mason-jar-gift)
  2. The Art of Mason Jars and Chalkboard Paint • Using mason jars as canisters.
    (www.bethericksondesigns.com/allthingscreative/2016/5/30/the-art-of-mason-jars
  3. Pumpkin Granola and The Art of Hostess Gifts • Pumpkin granola packaged in a mason jar for a hostess gift, free recipe and download included. (www.bethericksondesigns.com/allthingcreative/2016/11/10/pumpkin-granola-and-the-art-of-hostess-gifts)
  4. Mason Jar Easter gifts • Using Mason jars as Easter baskets with a free download.
    (www.bethericksondesigns.com/allthingcreative/2017/3/29/mason-jar-easter-gifts-free-download)
  5. Father’s Day Gifts Simplified • Dad has everything he needs right? Why not tell him how you feel about him with a themed candy jar.
    (www.bethericksondesigns.com/allthingscreative/2017/6/9/fathers-day-gifts-simplified)
  6. Homemade Christmas Ornaments • Photo Christmas ornaments made from Mason jar rings and lids.
    (www.bethericksondesigns.com/allthingscreative/2017/12/14/diy-homemade-photo-christmas-ornaments)

I am sure these are not the last Mason jar ideas I will come up with, but I thought it might be helpful to have them all listed in one place for easy reference! I am sure if you searched online you could probably find a ton more! Why? Because Mason jars are really just so much fun to find new use for! From vases to water glasses and so much more!

Just to prove my point, coming soon to the blog I will have a tutorial on making table numbers for your wedding or party using the Mason jar rings, lids and wine or sparkling cider bottles.

Visit www.bethericksondesigns.com for other great tutorials and daily encouragements!

DIY: Homemade Photo Christmas Ornaments

I know it’s a bit late in the Christmas season for this post but hopefully some of you will have some time to give this idea a try!  This project is super simple and takes less than an hour. It’s perfect for children with just a little help.

The other wonderful thing about this project is that it will create memories and bring back old memories as you make the ornaments and as you put them on the tree each year.

I also think that most of us have the supplies needed for this project sitting around our homes, just waiting to be used and if you don’t they are not expensive or hard to find.

In this post I will go over two different ornament ideas and give you step-by-step instructions for both.

Supplies:

Optional Supplies:

PHOTO ORNAMENT

Step One: Trace a circle the size of the flat area of the Mason jar insert. You don’t want your photo to all the way to the edge of the insert as the will make it harder to glue in place.

Step Two: Make sure your photo fits in the Mason jar ring and that everything shows that you want to see.

Step Three: Embellish with Christmas Stickers or a white gel pen or chalk pen if you wish.

Step Four: Glue your photo to the Mason jar lid insert using Mod Podge as your glue. Spread it evenly over the insert and them place your photo image side up on the insert. You can then coat over your photo with Mod Podge if you wish.

Step Five: Tie a ribbon around your Mason jar ring. (This will be your ornament hanger) Add any Christmas charms to the ornament hanger at this time.

Step Six: Gluing the insert inside of the ring. (Now is also a good time to write with a sharpie on the back of your ornament if you wish.) Run hot glue along the inside rim of the mason jar ring and quickly place your lid insert with the photo facing down into the ring and press down to glue in place. Then, to make sure it stays place hot glue in several places along the “crack” between the ring and the insert to form a hot glue “tab” to hold the insert in place.

Chalkboard Ornament:

Step one: Paint your Mason jar insert with chalkboard paint or another solid color (ex: red or green) let it dry. (Coat the lid with your chosen color several times.)

Step two: With the white chalk marker decorate your painted Mason jar insert with Christmas images or seasonal sayings. (When making my own chalkboard ornament I found that a gel pen scratches off the chalkboard paint, so its better to use a chalk marker.)

Then complete steps five and six above to finish your ornament.

Optional decorating ideas

After you have completed the steps above you can wrap the outside edge of your Mason jar ring with ribbon or paint the edges if you wish!

Optional Ornament Ideas:

This is also a fun way to preserve images from Christmas cards, gift tags or wrapping paper if you don’t want to use family photos. You could also cover the backside of the ornament with holiday paper to give the back a more finished look.

Now that was simple! I hope you enjoy your keepsake ornaments and place them on your tree each year. These ornaments would also make wonderful gifts for grandma and grandpa.

If you don't have these supplies and would like custom made ornaments, please feel free to contact me.

Please feel free to leave any comments, or photos of your completed projects below.

Source: www.bethericksondesigns.com

Top