Pumpkin Granola and the Art of Hostess Gifts
Hostess gifts used to be the norm along with thank you cards for just about everything from hosting friends for dinner to gifts of all kinds. It seems that these two traditions showing appreciation for family and friends have gone by the wayside. But why has this happened? Are we too selfish to think of others? We think they will cost a lot of money? Are we worried people will think us weird or old-fashioned?
Well, I say who cares what anyone thinks. It’s time to bring these two traditions back to being normal. A hostess gift does not have to cost you a bundle and a thank you note can be sent by e-mail, but personally I think a hand written, mailed note, that someone has taken the time to address, stamp and place in the mail box means so much more!

Thank you cards are very affordable these days with places like Ross, Marshalls, The Dollar Tree and Tuesday Morning. Hostess gifts can also be affordable.
This whole idea of a homemade hostess gift came to me when I was making pumpkin granola for a potluck from a recipe given to me by my sister. As I was putting it in mason jars to take to the potluck, it struck me, if I designed a label and a recipe card to go with it, that it would make a wonderful gift. That’s how this blog post was born. I am including a designed pumpkin granola recipe card along with a blank one with this post. Use it as many times as you like and share it with friends and family. My sister created this granola from a cookie recipe a friend gave her and it was a huge success at my church potluck. Enjoy!
Hostess Gift Ideas:

- Mason Jar of Homemade Granola (Pumpkin Granola Recipe Card Download here)
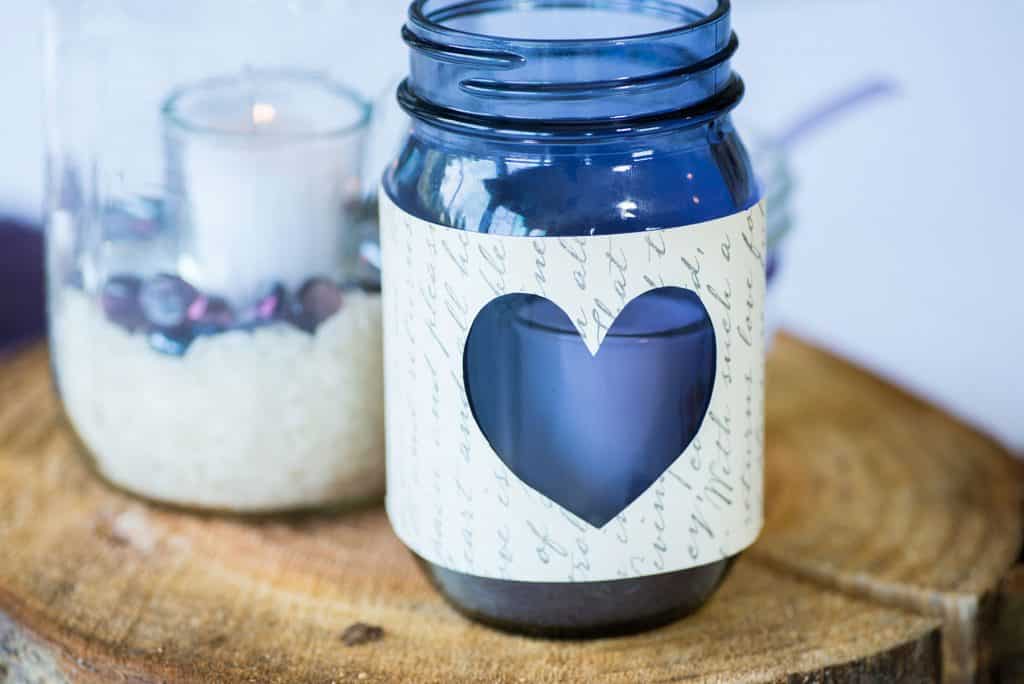
Most of us have mason jars just sitting around our house and they are super easy to fill with some homemade granola, wrap with some pretty scrapbooking paper or one of our mason jar wraps sold HERE and ribbon. Complete these steps and you have a very affordable hostess gift ready to go. Another idea is to include the recipe for your granola on a decorated recipe card. Punch a hole in the card and tie with the ribbon you are using to decorate your mason jar.
- Mason Jar filled with the host favorite candy
- Mason Jar filled with homemade candied nuts (See Pinterest for recipes)
- A scented candle
- A dishtowel appropriate to the season
- A bouquet of flowers or a plant
- A bottle of wine or sparkling cider (which can also be decorated with one of our mason jar wraps)
- A tin of homemade chocolates or cookies
- One Hour Bowl Cozies (as seen HERE) to match the Hostesses kitchen
There are also many handmade items you can give as hostess gifts, a few homemade note cards, a handmade Christmas ornament, a hand-sewn pot holder or dish cloth, a bread basket liner and more.
Let’s join together to bring back the art of hostess gifts this holiday season. Visit our Etsy store to purchase our Mason jar wraps (They can be used to wrap a peanut jar, a mason jar, a bottle of wine or cider and more!) or thank you cards that you can print at home.
More holiday tips and tricks to come in the next few weeks!
Pumpkin Pecan Granola
- 1/2 cup Pumpkin Puree
- 1 large egg
- 1 tsp vanilla
- 2 1/4 cups oats
- 1/4 tsp salt
- 1 1/2 tsp cinnamon
- 1/4 tsp Nutmeg
- 1/4 tsp ground cloves
- 1/2 cup chocolate chips
- 1/2 cup chopped pecans
- 1/2 cup dried cranberries
Heat oven to 350 degrees. Combine all ingredients in large bowl until oats are coated, line cookie sheet with parchment, cook at 10 min intervals, stirring between until browned and crunchy, cool and then store in glass containers.