We are just few weeks away from Easter and I thought this would be the perfect time to review my Easter tutorials and DIY projects.

Today I will provide links to my top three tutorials from previous years and talk about two alternative ways to decorate Easter eggs (with links included).

My sister and I are going to dye Easter eggs again this year and I thought it would be fun to try two new ways to decorate our eggs (highlighted below). After trying these I will be writing a blog evaluating each process. My goal is to help direct you to the process that will work best for you and your family.

In March of 2017, I wrote three blogs on Easter gift ideas and DIY decorations.

Mason Jar Easter Gifts

The Mason jar Easter gifts gave you new and creative ways to package your Easter gifts. Also included was a free download (which is still available).  This tutorial can be found here along with the free download.

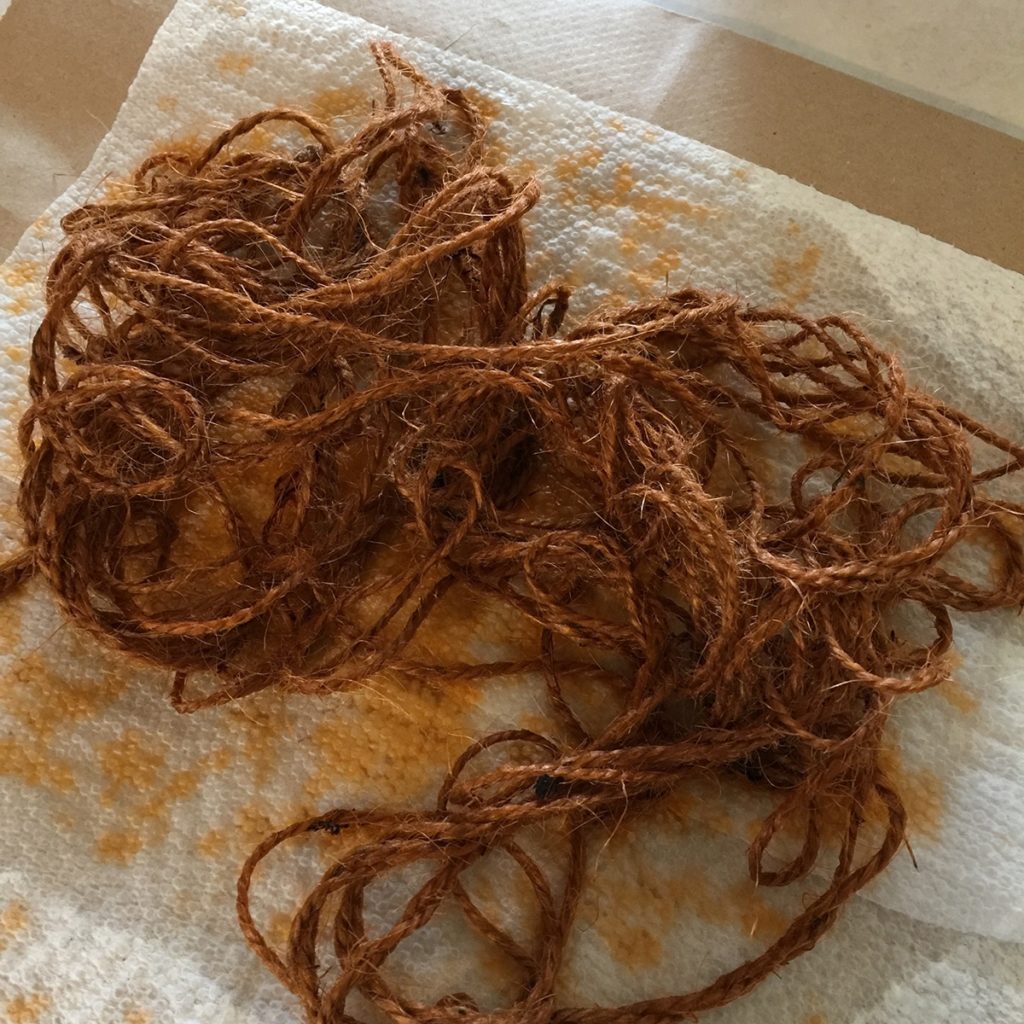
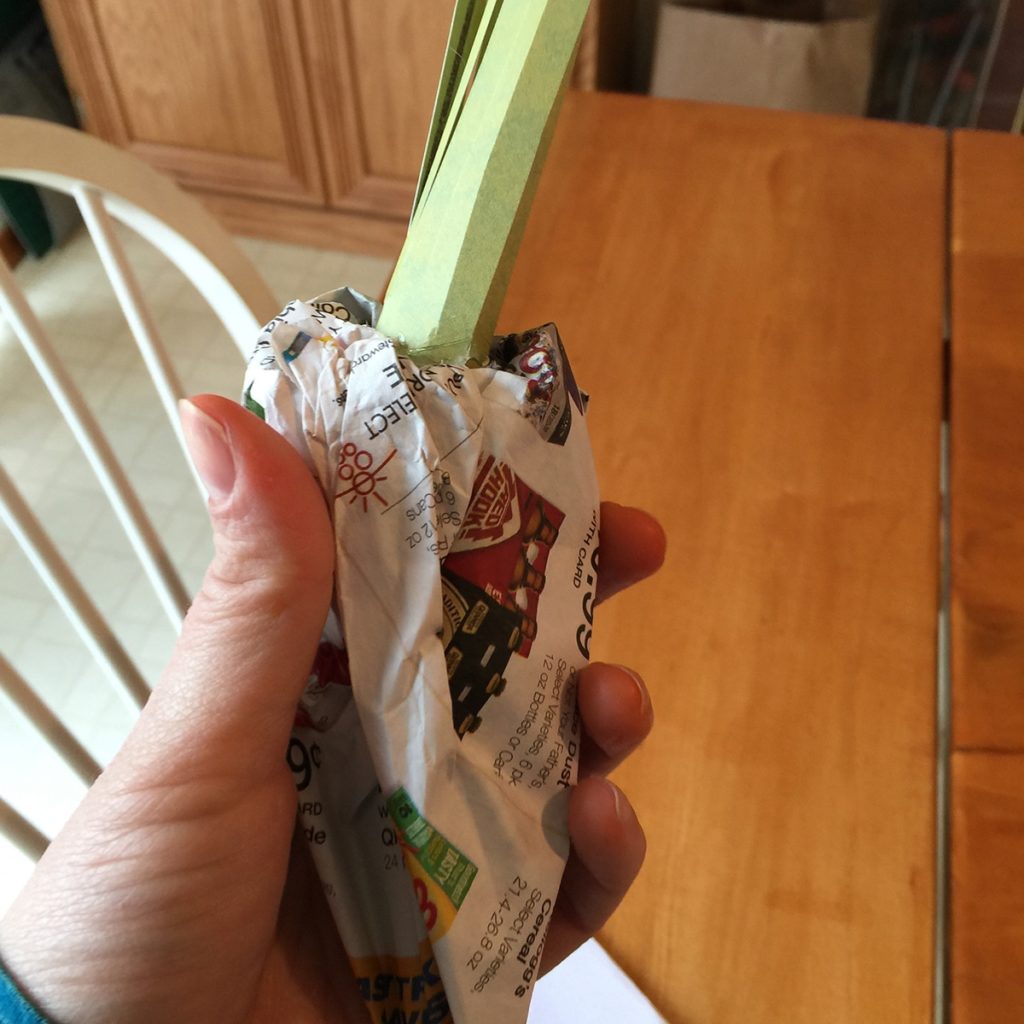
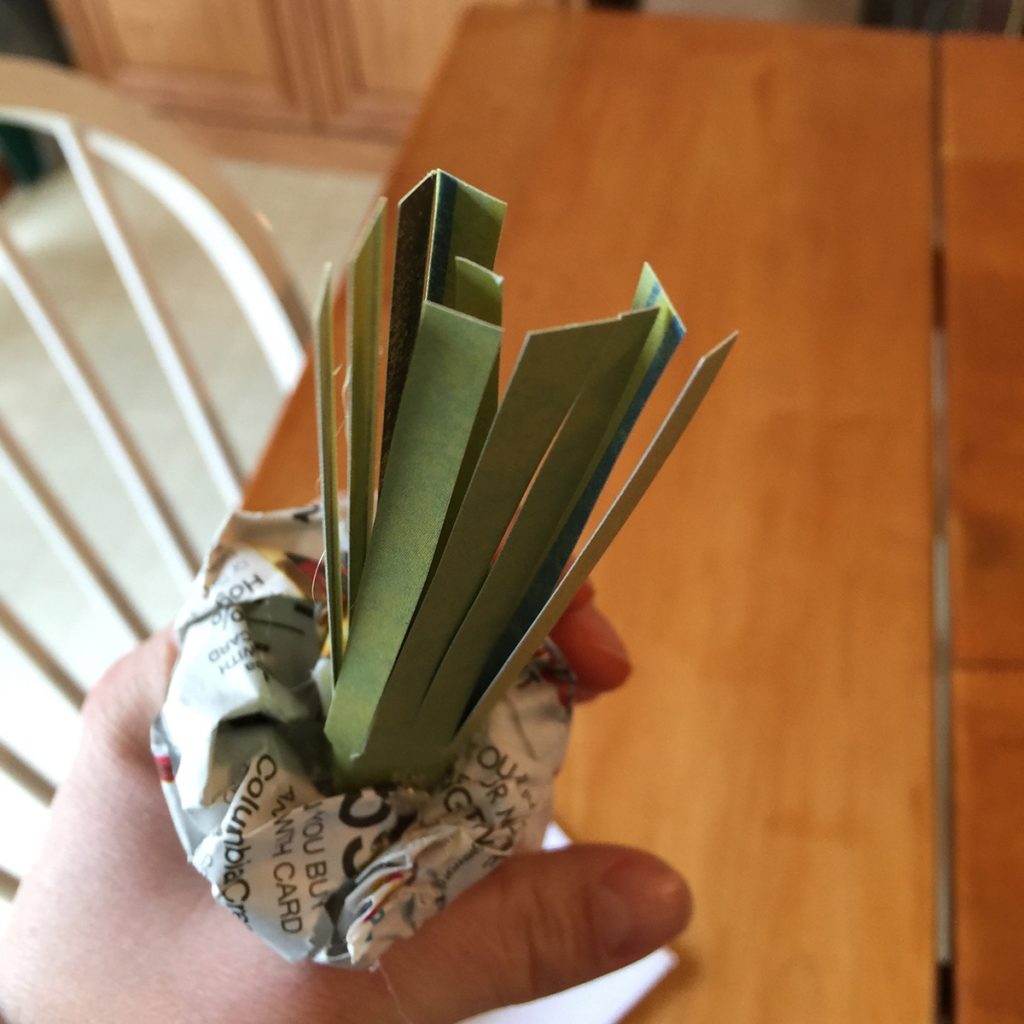
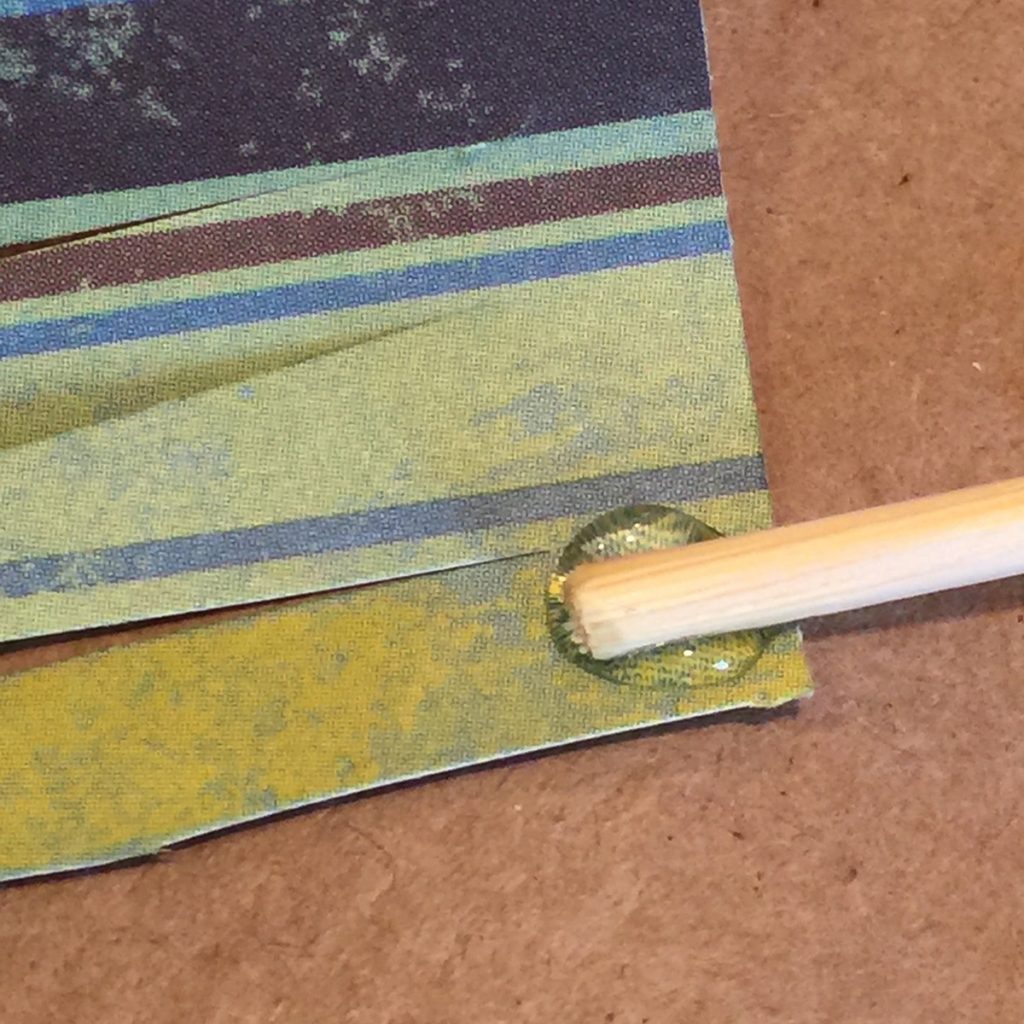
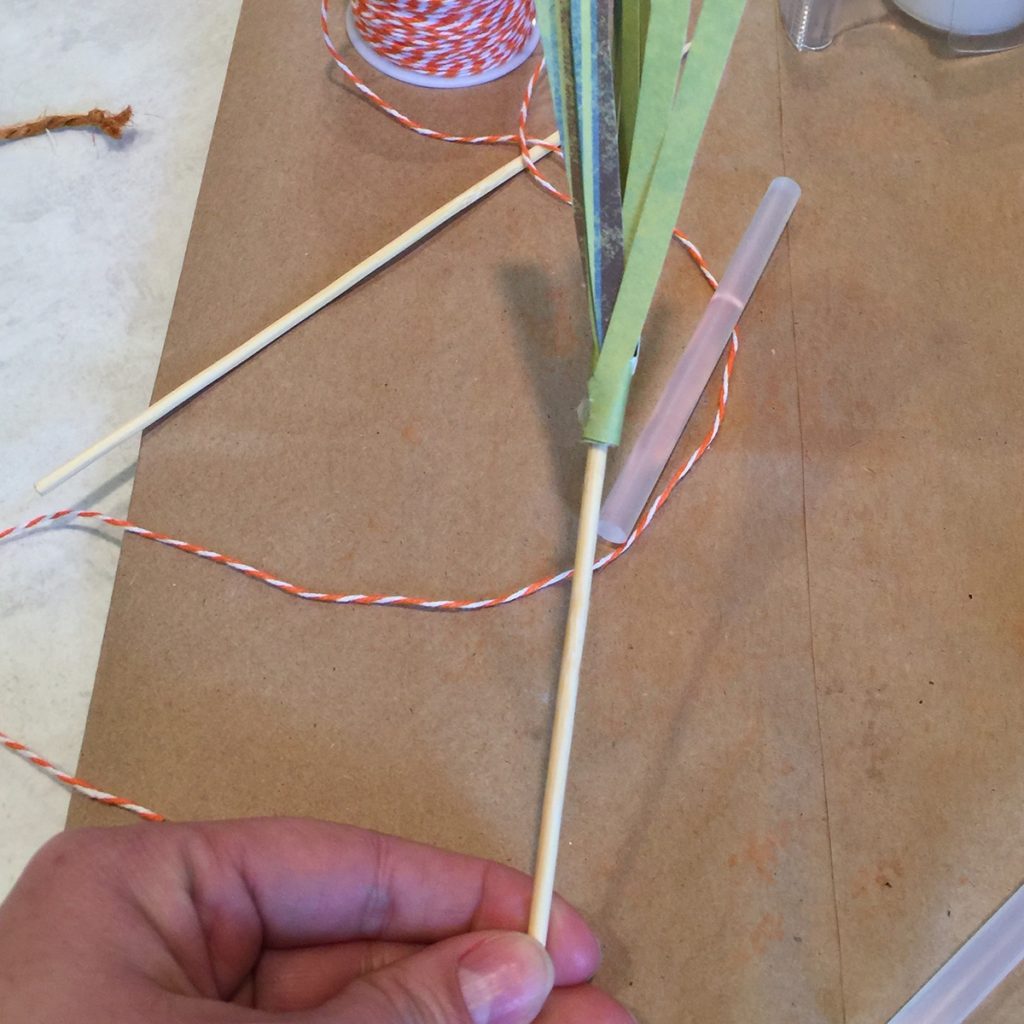
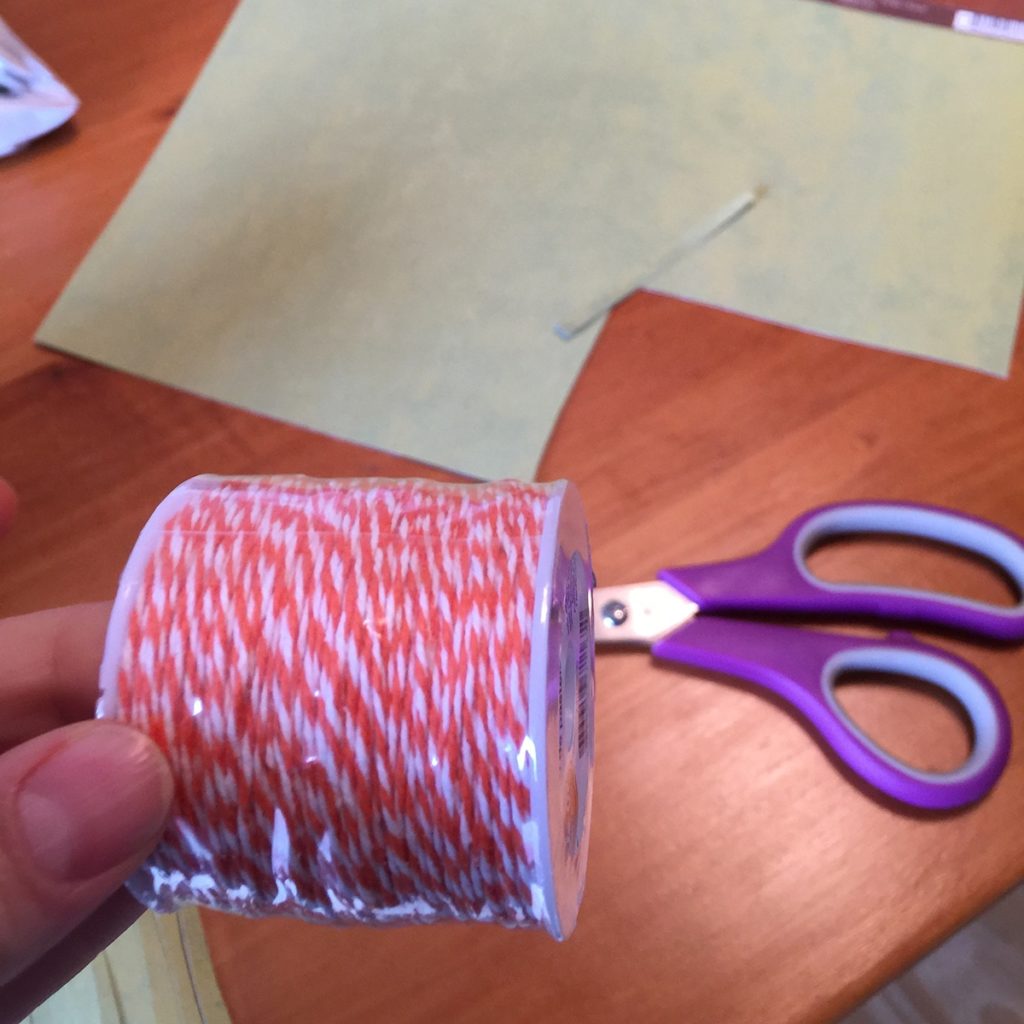
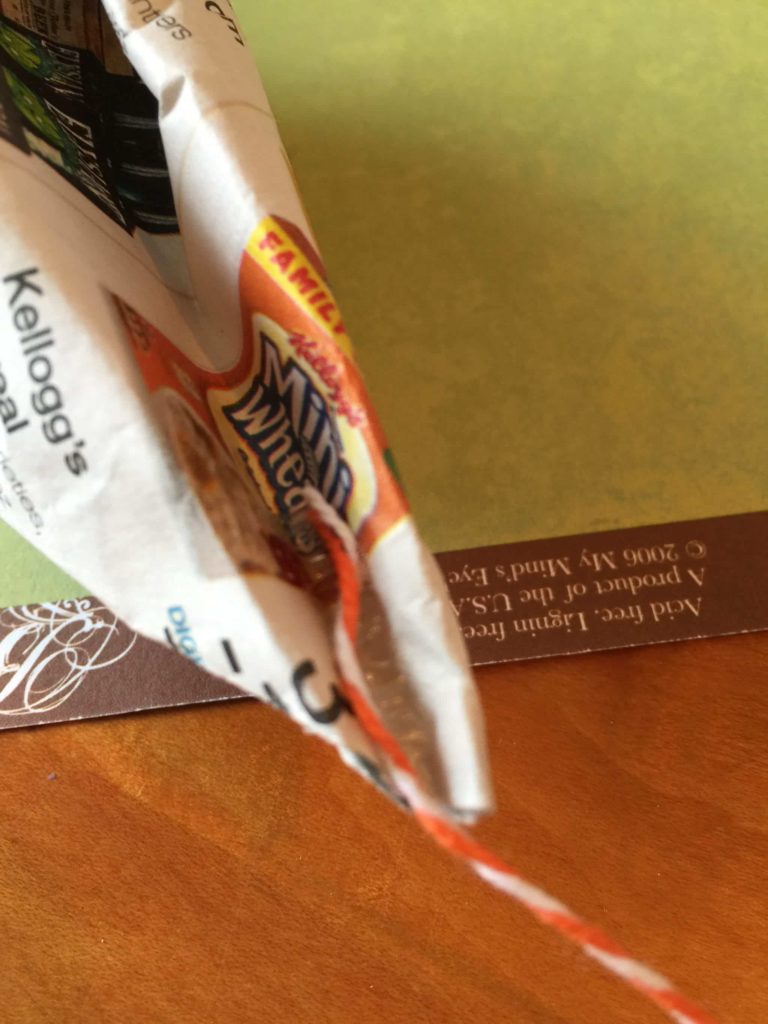
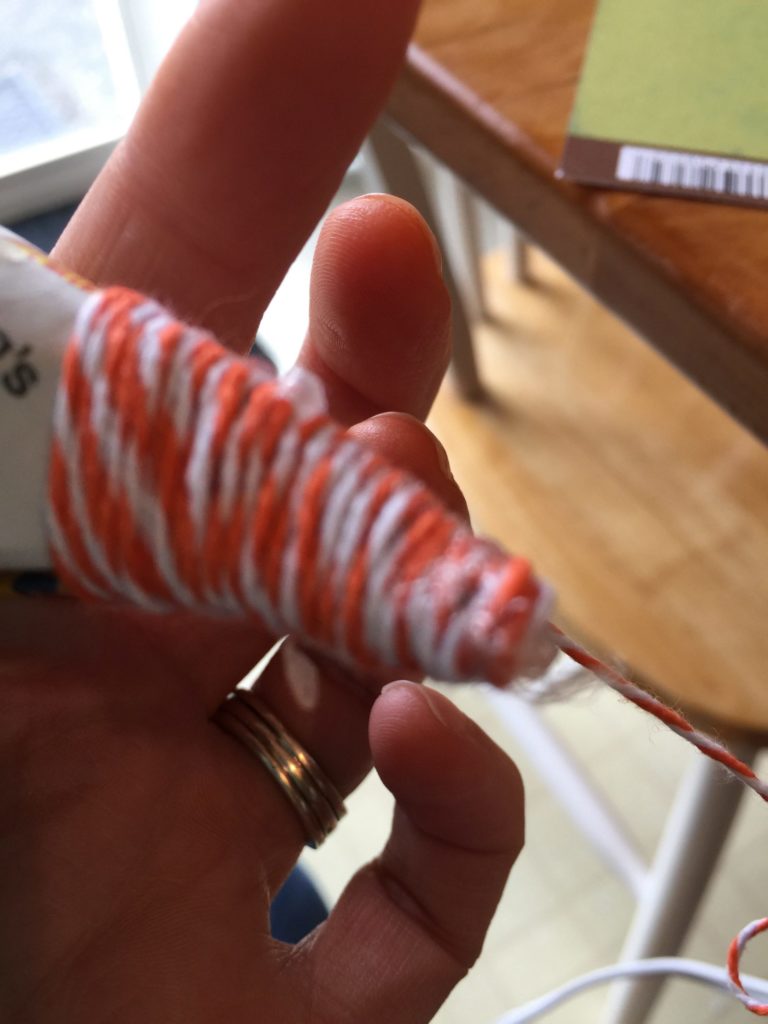
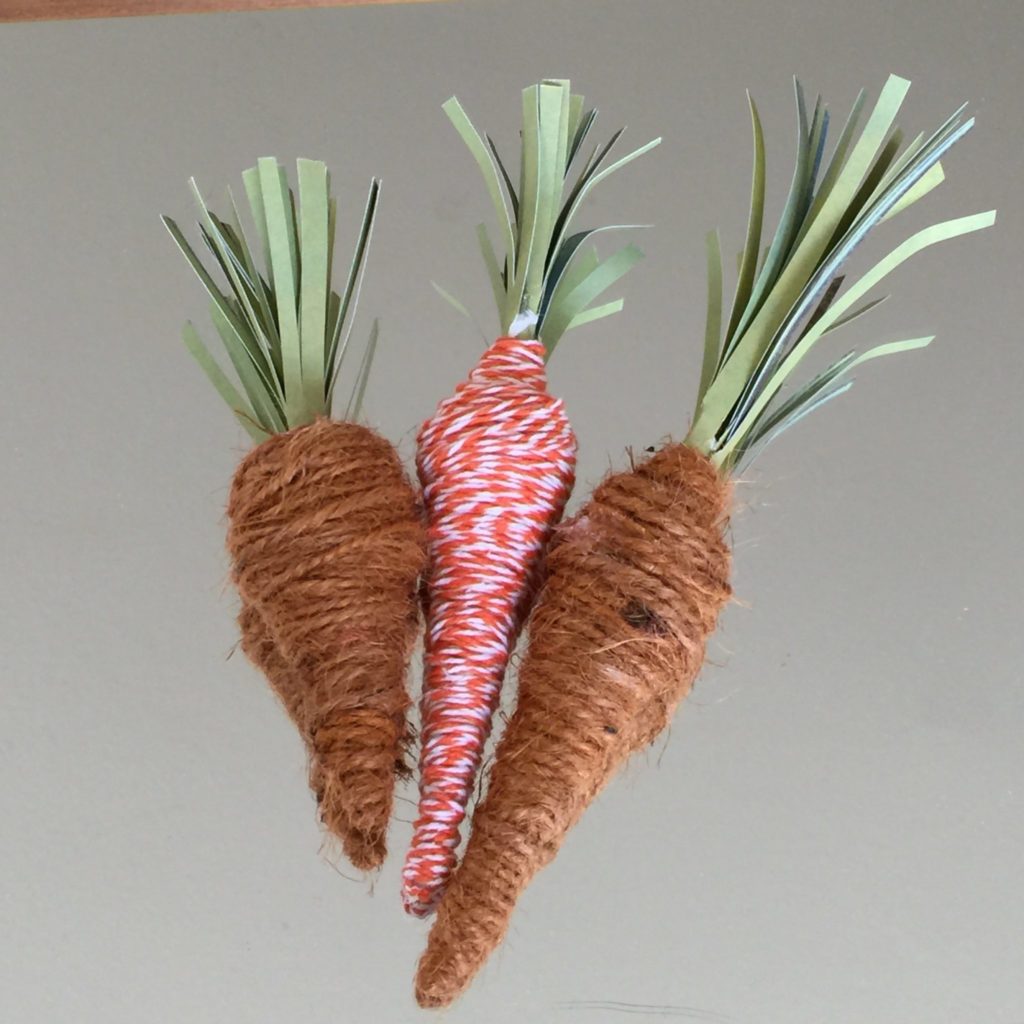
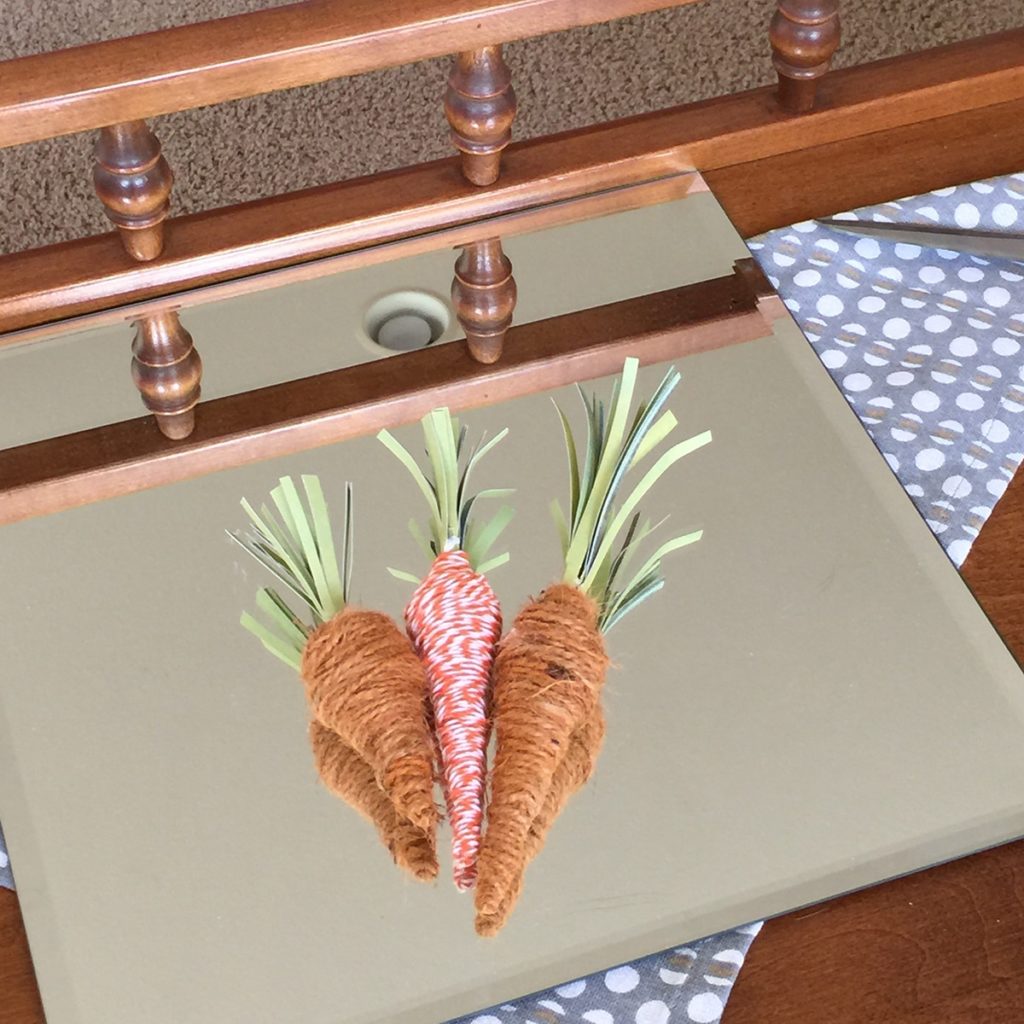
DIY: Rustic Easter Carrots

That same month I wrote another tutorial on making rustic twine carrots which can be used in Easter/Spring decorating around your home. I enjoy decorating for a variety of holidays and hope some new ideas will encourage you.  Find the Rustic Carrot tutorial here.
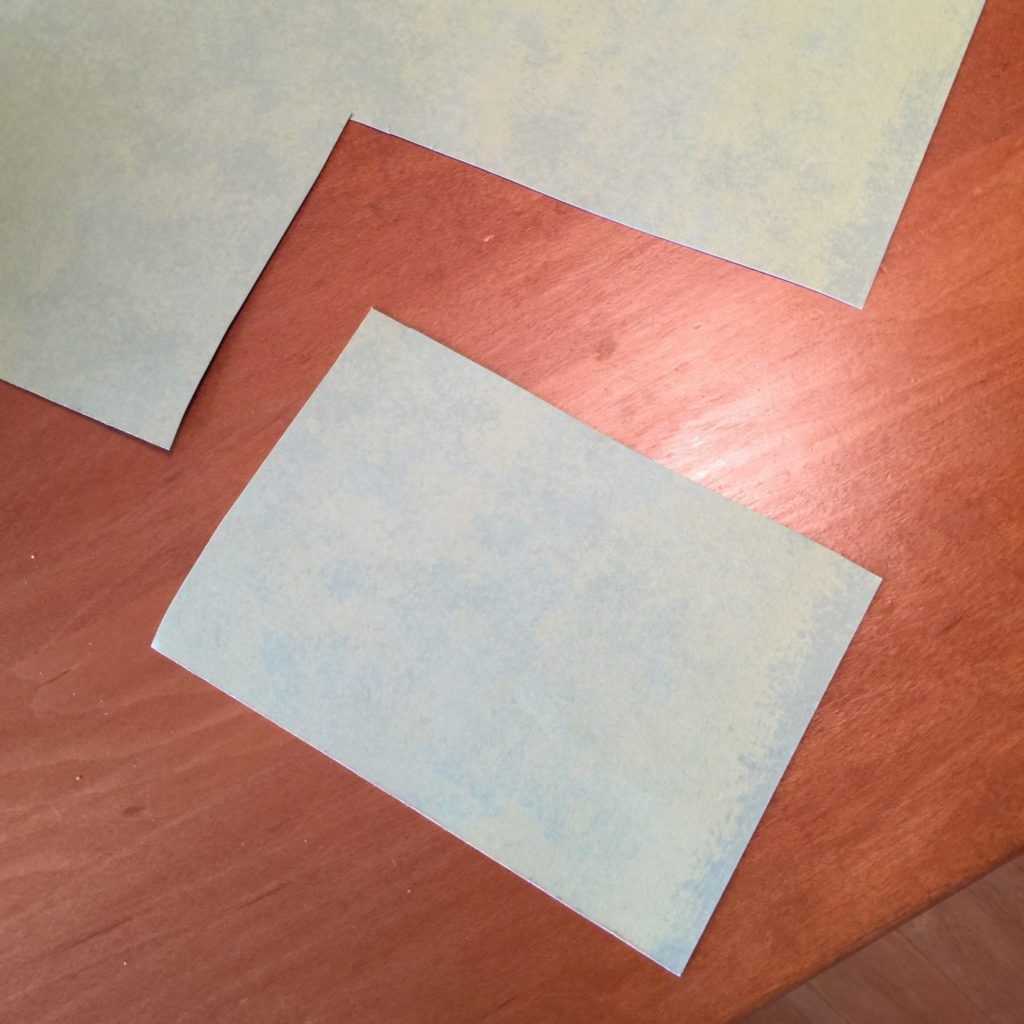
DIY: Easter Garland

Then we also enjoyed a tutorial on how to make your own watercolor “Easter Egg” garland, which is a perfect project to do with your children or in a classroom. In this tutorial we painted traced “egg” shapes with watercolors, cut them out and punched holes in them. Then we attached ribbon to make a garland. This idea would also work well for Easter gift tags or greeting cards. You can find this tutorial here.

Alternative Egg Decorating Ideas

There are two alternative egg decorating ideas that I am going to explore this year. One involves bleeding tissue paper and the other shaving cream! Both of these directions give you multi-colored Easter eggs and they look like they might be easier for young children and less messy than traditional methods (no cups of dye to knock over or splash on your neighbor, counter or kitchen table).

The first tutorial uses shaving cream and food coloring. All the steps are outlined here on www.athriftymom.com.

Next up is dying Easter eggs with tissue paper. The key to this one is buying “bleeding” tissue paper - the only type of tissue paper that will leave colors behind on your eggs. You can find the complete step by step process here on www.thecraftyblogstalker.com.

I will post my evaluations and pictures of the new processes soon, so look for that coming up. Until then enjoy the Easter season and find joy in the fact that spring is upon us!

6 Mason Jar Tutorials Revisited

Maybe it’s just me, but I am obsessed with Mason jars. I am always looking for a new way to use them and I am still coming up with a few new ideas here and there! With the beginning of the New Year, I thought this would be a good time to revisit six of our previous Mason jar tutorials, along with a few new ideas and a glimpse into coming tutorials.

We have touched on how to use mason jars for gifts, storage and how to use the lids and rings to create unique memories for your Christmas tree.

But first a little Valentines Day treats! New to the Etsy shop are two instant downloads that can be used on a Mason jar or a milk bottle to make a sweet treat for your special someone! These downloads are designed to match two candies, Reese’s Pieces and Red-hots! Click the images above to purchase the download and complete your own Valentine’s Day project. Then read on to review our previous Mason jar tutorials and find on that fits your needs.

Tutorials revisited:

  1. The Art of Mason Jar Gifts • Using Mason Jars as gift baskets.
    (www.bethericksondesigns.com/allthingscreative/2016/4/25/the-art-of-mason-jar-gift)
  2. The Art of Mason Jars and Chalkboard Paint • Using mason jars as canisters.
    (www.bethericksondesigns.com/allthingscreative/2016/5/30/the-art-of-mason-jars
  3. Pumpkin Granola and The Art of Hostess Gifts • Pumpkin granola packaged in a mason jar for a hostess gift, free recipe and download included. (www.bethericksondesigns.com/allthingcreative/2016/11/10/pumpkin-granola-and-the-art-of-hostess-gifts)
  4. Mason Jar Easter gifts • Using Mason jars as Easter baskets with a free download.
    (www.bethericksondesigns.com/allthingcreative/2017/3/29/mason-jar-easter-gifts-free-download)
  5. Father’s Day Gifts Simplified • Dad has everything he needs right? Why not tell him how you feel about him with a themed candy jar.
    (www.bethericksondesigns.com/allthingscreative/2017/6/9/fathers-day-gifts-simplified)
  6. Homemade Christmas Ornaments • Photo Christmas ornaments made from Mason jar rings and lids.
    (www.bethericksondesigns.com/allthingscreative/2017/12/14/diy-homemade-photo-christmas-ornaments)

I am sure these are not the last Mason jar ideas I will come up with, but I thought it might be helpful to have them all listed in one place for easy reference! I am sure if you searched online you could probably find a ton more! Why? Because Mason jars are really just so much fun to find new use for! From vases to water glasses and so much more!

Just to prove my point, coming soon to the blog I will have a tutorial on making table numbers for your wedding or party using the Mason jar rings, lids and wine or sparkling cider bottles.

Visit www.bethericksondesigns.com for other great tutorials and daily encouragements!

The first day of spring has come, daffodils are blooming andtulips are beginning; all of this means Easter is drawing near! So…. Easter egg hunts, baskets, gifts and celebrations are just around the corner!

I love going to the craft store and buying new craft supplies, but I also find joy in using supplies I have around the house to make something special for that special someone. This blog is dedicated mostly to things I already have on hand and stars another one of my favorite things, mason jars! I am not sure where my love of mason jars came from, but they really are very useful around the house. I use them in the kitchen, for decorations, in my craft room and for gift ideas all the time!

This project falls right in line with a blog I wrote last year about mason jar gift baskets and all the different things you could fit in mason jars to make a unique gift, tailored to the person you were giving it too.

Easter can get really expensive with Easter eggs to fill, Easter baskets to give, eggs to dye, candy to buy, special desserts to make and so much more. So lets cut some of the cost by using some things we already have on hand.

Supplies needed:

  • Mason Jars – any size
  • Easter themed parchment paper or tissue paper
  • Ribbon
  • Scissors
  • Items to fill the Mason jar (Candy, bubbles, gift card, small toys, yo-yo’s etc.)
  • Mason Jar Printable – Fits wide mouth Mason Jar (Optional)

This project really is very simple if you follow these steps.

Step one: Trim your parchment or tissue into a square. You can use any size square that will hang down over the sides of your jar. The size depends on how much you want your paper to hang over the edges.

Step two: Fill your Mason jar with your gifts.

Step three: Separate the Mason jar ring and the Mason jar lid.

Step four: Place your paper square on top of the ring and, press the lid into place allowing the paper to gather at the edges. Screw lid on the Mason jar. Optional version: Print out the mason jar label, trim to fit your mason jar lid, place square sheet of paper on ring, line up your label and lid and place on top of paper. Then, continue as above.

Step Five: Tie ribbon around the Mason jar ring.  Attach a gift tag if needed.

Enjoy your Easter season!

Easter is just around the corner and with it comes Spring! I can’t tell you how ready I am for this rain to go away and the sun to start shining! I am ready for Capri pants, tank tops, light sweaters and flip-flops! So, lets get ready for spring with this easy watercolor Easter egg garland and bring a little sunshine to your home with its fun pastel colors and patterns!

It doesn’t take much to complete this project and it’s perfect for all ages and skill levels. You don’t have to be an expert at watercolor to make this watercolor Easter egg garland! It’s a fun family project for a rainy Saturday before Easter. Think about having each family member make two or three eggs, string them all together and you have your garland! You could also include other shapes such as tulips or Easter bunnies.

Most of all just have fun creating your garland with these easy steps!

Supplies:

9 Easy Steps:

Step one: Download and print egg template included in this post. (on cardstock if you have it)

Step two: Cut out the egg template of your choice.

Step three: Trace the egg shape onto your watercolor paper, fitting as many per sheet as you can.

Step four: Paint your eggs with watercolors as desired.

Step five: Let them dry thoroughly.

Step six: Cut out your watercolor eggs.

Step seven: Punch two holes in the top of each egg as seen here.

Step eight: Attach ribbon through holes as shown.

Step nine: Hang your completed garland!

Another idea for your watercolor painted shapes is to use them to make Easter cards for family and friends by gluing them to the front of a blank card. If you don't have time to make your own garland but would like some to decorate your home, visit my Etsy store to purchase yours today! Also visit our store to purchase this instant download to use to decorate your home this Easter.

More Easter fun coming soon!

Easter is just around the corner and it means spring is coming soon! I love spring, the pastel colors, the sunshine and the warming weather. I also enjoy decorating my little home with Easter/spring decorations. Especially if I can make them economically myself! My goal this year is to have my crafts be mostly made out of supplies I already have lying around the house. Using what I already have is always better.

The rustic carrots in today’s tutorial are popular in almost every store I have visited this March. These carrots are made out of twine, burlap, or bakers string. They come in a variety of sizes, usually three to a package, because we all know that you decorate in odd numbers, right? Each time I have see a package of these fun rustic carrots in all different shades of orange I have thought to myself . . . I can make that!

This post will chronicle my attempts at recreating these carrots, what worked and what did not. Yes, even I make attempts at craft projects that fail, but those failures just give me a chance to re-think and improve my process. That way when I bring it to you, I can show you what really works.

The first attempt was a carrot made out of a newspaper base, wrapped with orange and white bakers twine, glued together with hot glue. This gave the carrot a much more free-form look as we all know carrots are not ever perfectly shaped. At the beginning it looked like my carrot was shaping up very nicely and I was thinking to myself, “Wow this is simple and going so well.” But as I advanced to the end of the carrot where the green leaves are attached, I found that creating this carrot was not going to be as easy as it looked. Getting the twine to correctly wrap around that end of the newspaper proved to be harder than it looked and I was not satisfied with my attempts or my final product. (As pictured above.)

So, the next morning as I was driving to get my step-son & take him to his bus, my brain was swirling with thoughts of these rustic carrots. How can I improve this project? What base would work better than newspaper for wrapping the twine around?  And it came to me! My next attempt will utilize an old pencil, a bamboo skewer or a piece of dowel. Whichever I can find at home. This will give for me a sturdier base and I believe it will allow me to wrap the twine more to my liking! Layering the twine or chosen material up and down the base until I like the shape of your carrot. So let’s get to the supplies you will need and the steps its takes!

Supplies

Step by step instructions:

Step one: To dye your twine orange if desired, mix orange food coloring, vinegar and warm water together until you have your desired color of orange. I used about 2 tablespoons vinegar, one cup of warm water and a few squeezes of orange food coloring. (This is not an exact science) Then I soaked my twine for about 4 hours. Remove from solution and layout on paper towels and paper bags to dry. (about 24 hours).

Step two: Cut your carrots base (pencil, dowel or bamboo skewer) to your desired length, mine were between 2 and 4 inches.

Step three: Cut a rectangle of green construction paper to desired length of greenery for the end of your carrot; cut little strips making sure to leave them attached at the bottom of your rectangle.

Step four: Hot glue your base to the greenery as shown. Roll the greenery around the base until its all wrapped around the base and glue the loose end as shown.

Step five: Tie a knot in the end of your twine, hot glue the knot to the opposite end of the base, let the glue set. When tying the knot in the bakers twine I tied three to four knots on top of one another to make sure I had a knot larger enough to cover the end of the skewer.

Step Six: Wrap the twine around the base holding any tail of twine against the base and wrapping the twine over the top of it to hold it in place. Wrap your twine the whole length of the base and up and over the bottom of your greenery.

Step seven: Wrap the whole length again from top to bottom, then continue wrapping up and down the length of the carrot layering more twine at the top and down the center until you have a carrot shape that you are pleased with.

Step eight: Hot glue the end of your twine in place and you are done.

Now you have a beautiful rustic twine carrot that you can use around your house or on a wreath to decorate for spring or Easter! You can make these fun carrots in any color that you wish!

Visit my Etsy store, www.bethannerickson.etsy.com if you would rather purchase this set of three rustic carrots.

Coming soon, Mason Jar Easter Baskets and watercolor Easter egg garland

Join our mailing list to
receive product
updates, blog posts, coupons, free
downloads and more!
Top